Wednesday, 31 January 2024

Simple Steps to Clean Airpods Without Damaging Them

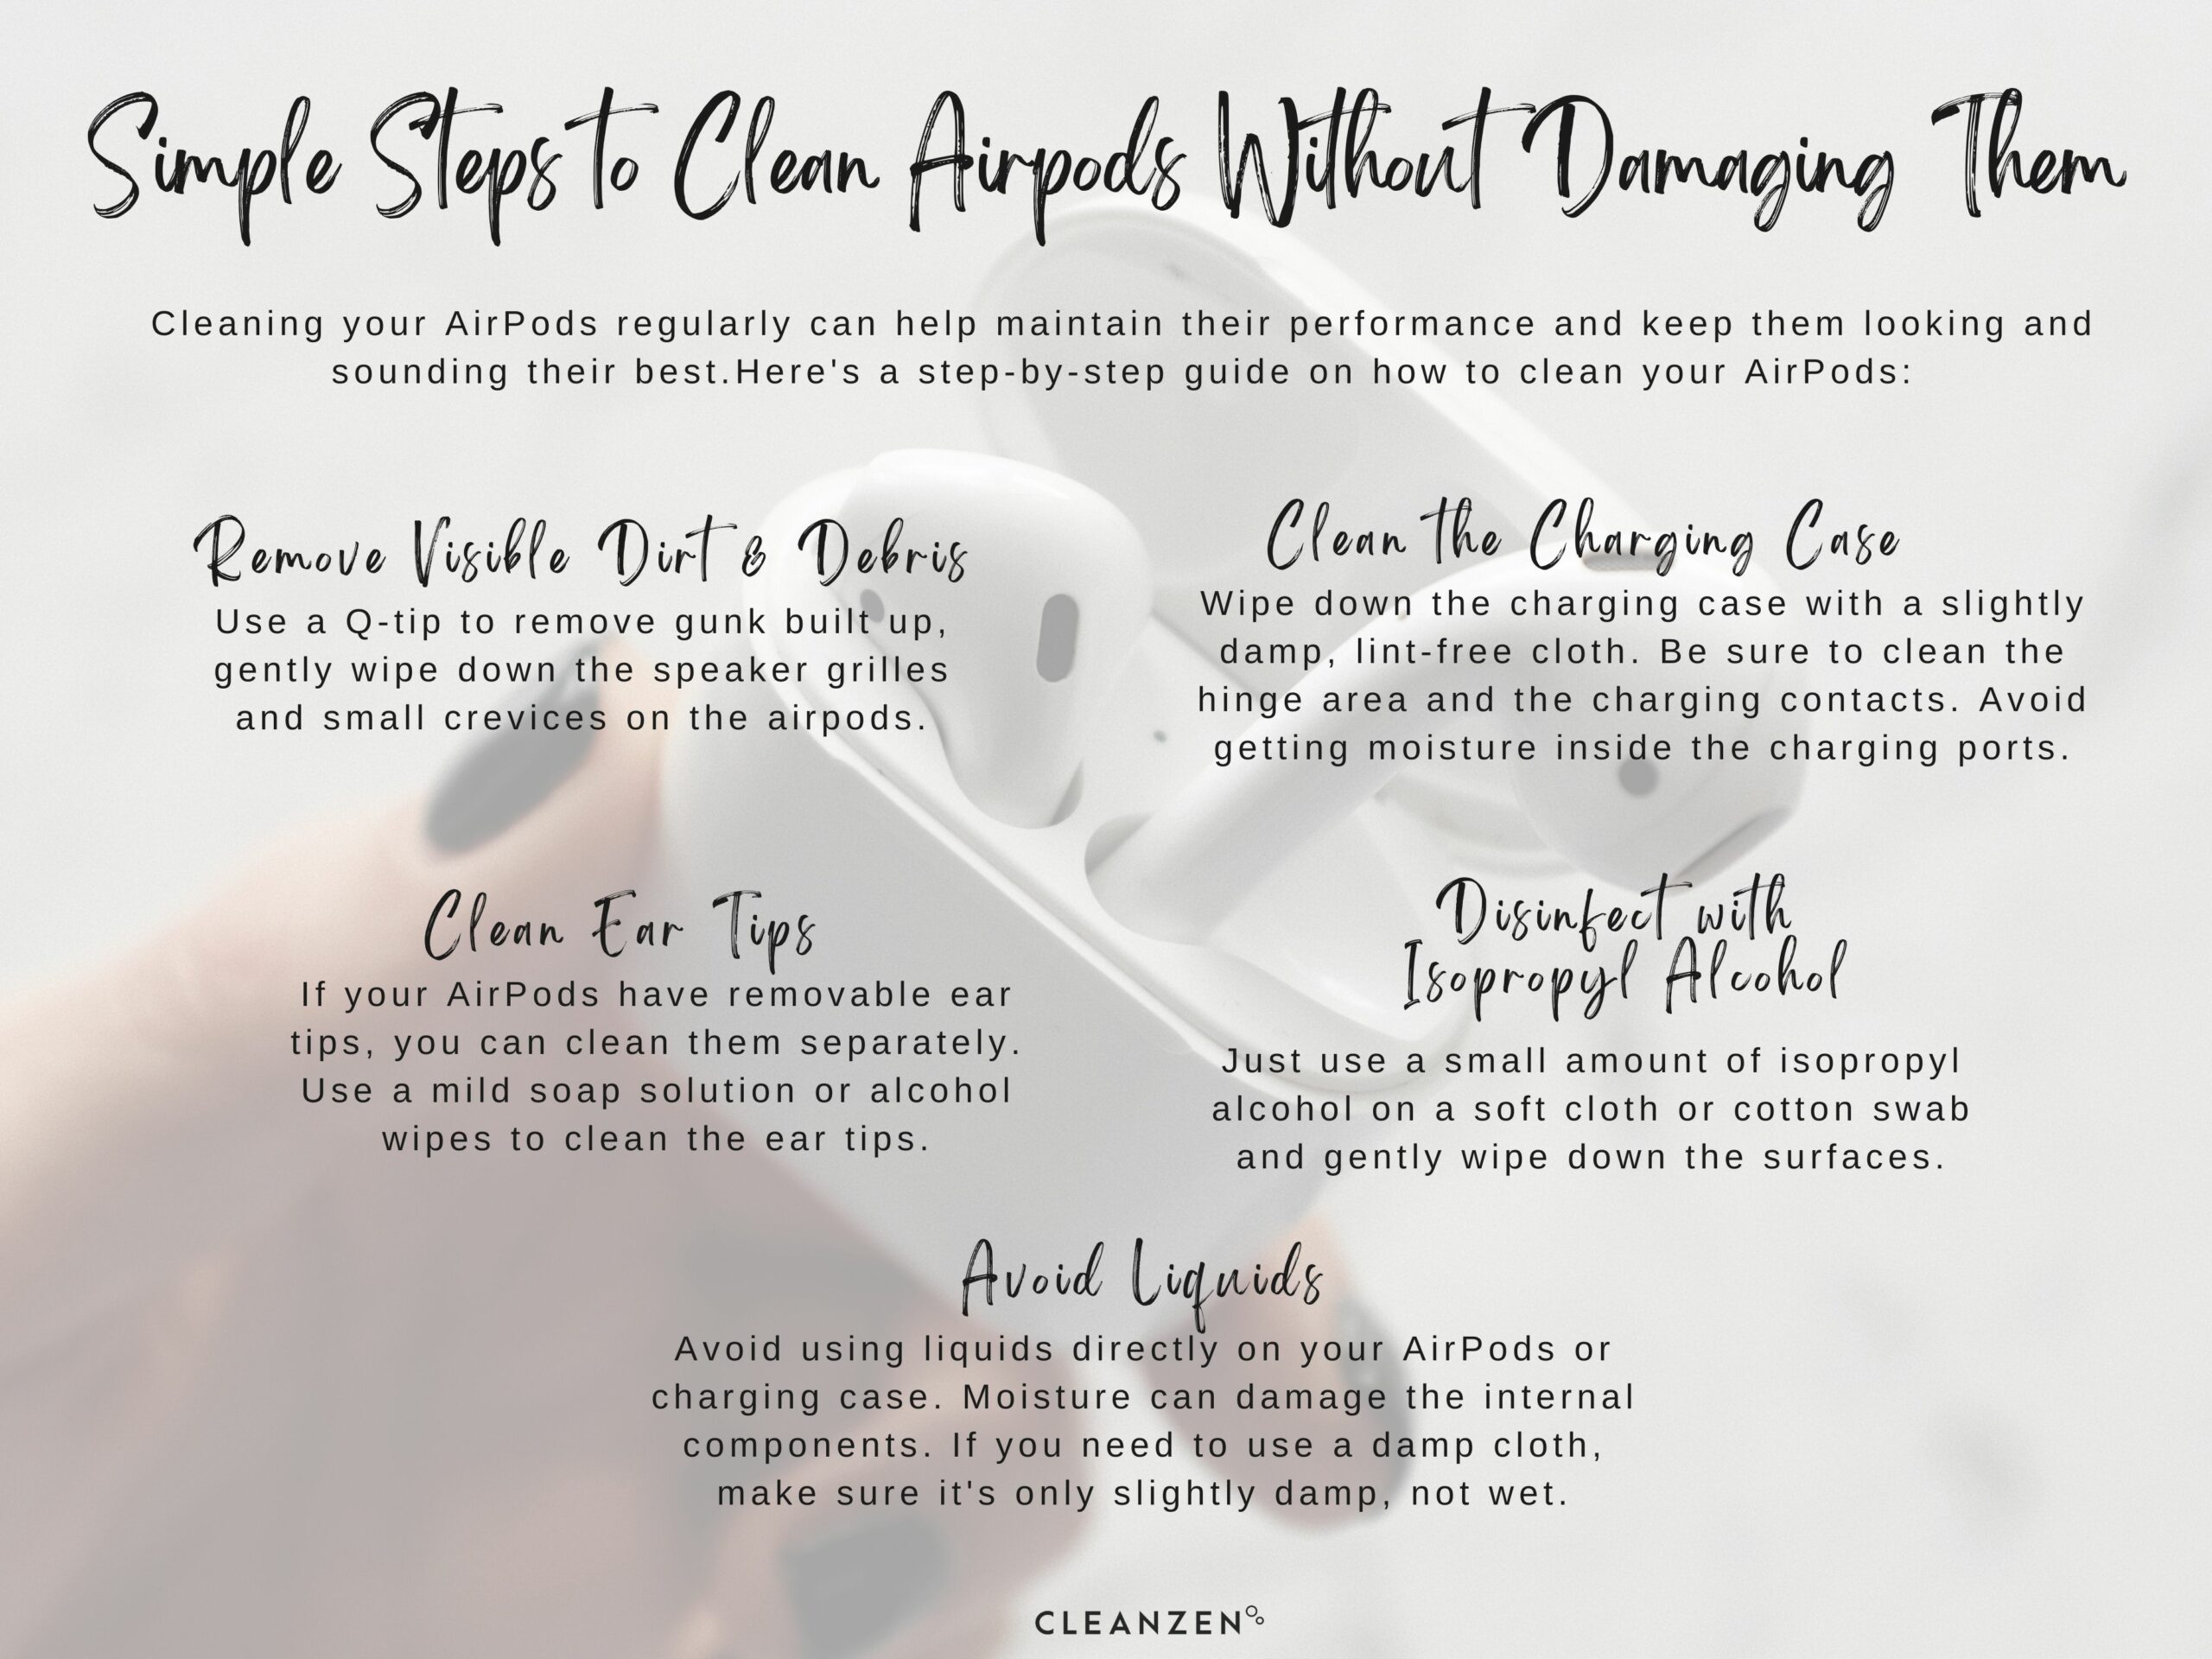
How to Clean Airpods Cleanzen Infographic


Airpods are placed directly in the ear canal with each use. In the ear, they can collect wax, dirt and other elements. This makes the airpods a breeding ground for bacteria. You can then introduce the bacteria into your ear when you use the airpods, and the bacteria can result in an infection.


In addition, the waxy residue can block the grille and prevent you from enjoying the best sound from your airpods. While you need to clean your airpods regularly, this should be done with care. Even waterproof airpods can be damaged when they are cleaned improperly.


How Often to Clean Airpods and Their Case


Both airpods and their case should be cleaned frequently to prevent bacteria from growing on them. The airpods should be cleaned within 72 hours of the last use. While you should follow the easy cleaning steps at least twice per week with daily use, cleaning is not as frequent if you use your airpods less frequently.


How to Clean Your Airpods, Earbuds and Wireless Charging Cases


How to Clean Airpods Cleanzen Image of Airpods on an Ear


To clean your airpods, earbuds and wireless charging case, follow these steps.

  • Gather the necessary cleaning materials, which include a microfiber cloth, a Q-tip and isopropyl alcohol wipes. A soft-bristle brush can also be used.
  • Use the microfiber cloth to wipe down the exterior of the airpods and earbuds as well as the charging case.
  • Using the Q-tip, gently wipe down the speaker grilles and small crevices on the airpods. This will remove much of the gunk that has built up there. However, avoid applying too much pressure as they may cause damage and press the accumulated wax and debris behind the grille. Once there, the gunk cannot be removed.
  • After the debris has been removed, you need to disinfect the airpods. With either a lightly damp microfiber cloth or an isopropyl alcohol wipe, clean the airpods. You can use these same supplies to clean the earbuds and the wireless charging case.
  • If the earbuds have silicon tips, remove these. Using soap and warm water, clean them with a soft cloth. Ensure that they are completely dry before putting them back in place.
  • There may still be dust and other debris in the charging port of the wireless charging case. Using a clean toothbrush or another soft-bristle brush, gently brush this area until it is clean.


There are alternative cleaning methods that are equally as effective. For example, you can use a pencil eraser to wipe the gunk away. This should be done with care. Use the microfiber cloth to remove any remaining residue. You could use brush off the grille gently with an anti-static brush, such as a paint brush or a makeup brush. A dry toothbrush with soft bristles is another option.


What to Avoid When Cleaning Airpods and Earbuds


How to Clean Airpods Cleanzen Image of Apple Airpods Pro and Airpods on a White Background


When cleaning your airpods, it is critical to avoid getting them wet. This can cause irreparable damage and lead to the need for a replacement. You also should not use a standard towel or cleaning rag as these can be too abrasive and may cause damage.


Always refer to the official Apple guidelines for cleaning your specific AirPods model, as different models may have slightly different cleaning recommendations.


How to Keep Your Airpods Clean Longer


While cleaning your airpods and charging case is relatively easy to do, keeping them cleaner for longer can save you time and energy. In addition, it may help you to enjoy the best listening experience from them. Rather than wait every few days to deep clean your airpods you can simply wipe them down immediately after each use. Simply keep a small microfiber cloth in the case for easy access.


You should also store your airpods in the case at all times unless they are being used. This will prevent excess dust and dirt from landing on them. Following personal hygiene steps can also help you keep your airpods cleaner for longer. Clean your ears with a combination of glycerin, mineral oil and hydrogen peroxide regularly. In addition, you should not allow other people to use your airpods.


FAQs


Is It Ok to Clean Airpods with Wet Wipes?


Wet wipes can be used to clean the exterior surfaces of airpods. However, the moisture should not get on the charging ports or the airpods’ grilles. Be aware that standard wet wipes do not have disinfectant or antibacterial properties. Because of this, it is best to use isopropyl alcohol wipes to clean airpods.


How Do You Clean Ear Wax Out of Airpods?


Wax buildup is a common problem with airpods. Each time the airpods are inserted into the ear canal, additional wax can stick to the grilles and various crevices. To clean the ear wax, use a clean microfiber cloth to lightly wipe down the surfaces. You can also use a soft-bristle brush or a Q-tip.


Does Apple Charge to Clean Airpods?


If you live near an Apple Store or are planning to pass by one soon (find a store near you), you can stop in for professional airpod cleaning. By doing so, you can ensure that the airpods are thoroughly cleaned and are not damaged during the cleaning process. This service is available to Apple customers at no cost.


Your airpods are only one of the many things that require care and maintenance on a regular basis. Finding time to care for all of your belongings can be a challenge. With Cleanzen cleaning services, you can free up valuable time by letting our professionals clean your home. Contact us today to inquire about rates and services.

The post Simple Steps to Clean Airpods Without Damaging Them appeared first on Cleanzen.


from Cleanzen https://cleanzen.com/blog/how-to-clean-airpods/
via IFTTT
Tuesday, 23 January 2024

How to Clean Makeup Brushes

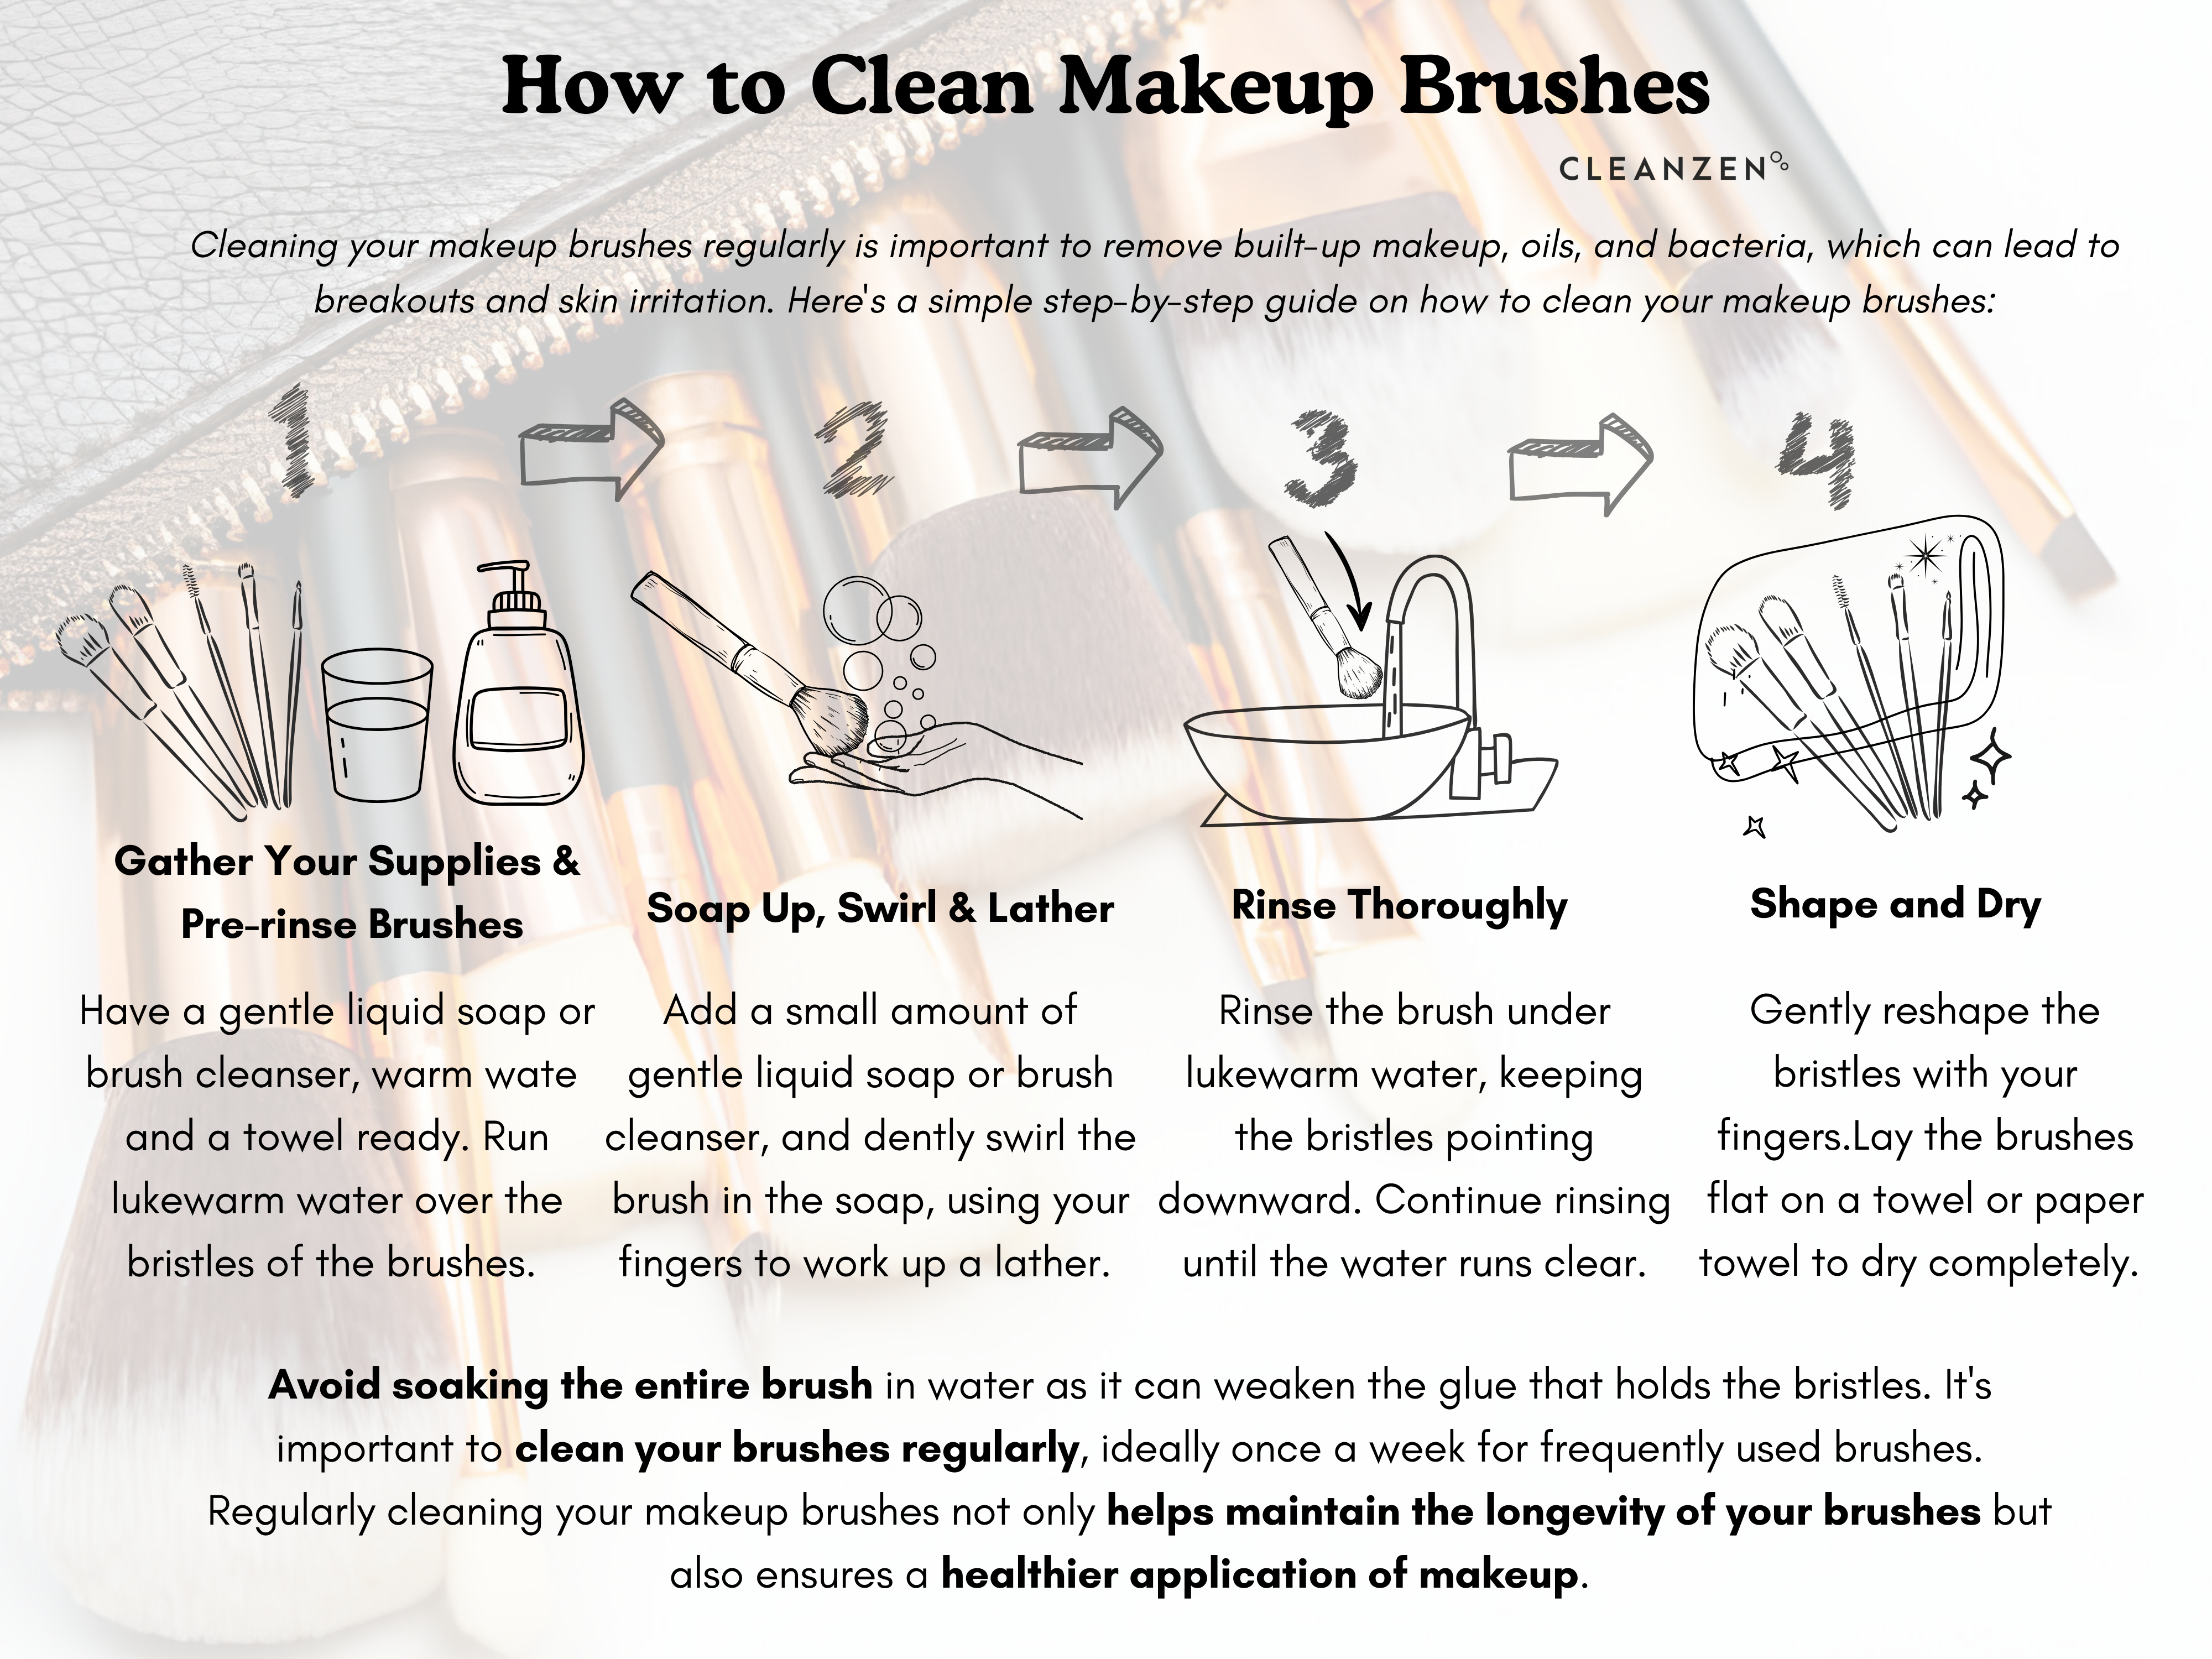
How to Clean Makeup Brushes Cleanzen Infographic


Cleaning your makeup brushes should be an integral part of your beauty regimen. However, many people do not clean their makeup brushes regularly. Others do not take the proper steps to clean them thoroughly without damaging them.


When you learn how to care for your makeup brushes, you can get the most of the brushes and enjoy healthier skin.

How Often Should You Wash Your Makeup Brushes


Each time you use your makeup brushes, dead skin cells and oil build up on the brushes in growing quantities. In addition, your makeup brushes are a breeding ground for bacteria. These elements can lead to clogged pores, pimples, skin infections or even allergic reactions.


How to Clean Makeup Brushes Cleanzen Image of a Woman That Developed a Skin Irritation


Dirty brushes can also negatively impact how well the makeup is applied. Because these elements build up with each use, washing the brushes at least once a month is essential. However, washing the makeup brushes regularly is ideal.


The makeup brushes that you use to apply wet products, such as concealer, blush or liquid foundation, should be cleaned after each use. You can most easily remember to clean your makeup brushes by allocating a few minutes on the same day each week for this important project.


How to Clean Makeup Brushes


If you choose to use a spray bottle to clean your brushes, combine warm water and your choice of liquid hand soap or non-drying bar soap in a spray bottle. Spray a microfiber cloth until it is damp. Lay the cloth flat, and run the brush bristles over it gently. Then, use your fingers to rub the soap throughout the brushes. When rinsing the brushes, ensure that they are pointed downward to prevent damage to the bristles.


When soap and makeup residue are no longer visible in the tap water, turn off the water. Squeeze the brushes gently to remove water. Then, use a clean towel to dry them further. Ensure that the bristles are properly aligned before allowing them to air dry on a flat surface. You can also use the JackCube Design Bamboo Brush Makeup Cosmetic Air-Drying Rack.


If you prefer to use shampoo to clean the brushes, start by running the brushes under a stream of warm water with the bristles facing down. Squeeze one or two drops of your preferred shampoo product on the brushes. Lay the brush in one hand, and use the other hand to create a lather. Then, rinse the brushes with the bristles facing downward until the water runs clean. Towel-dry and reshape the bristles, and allow the brushes to dry.


Can you use Dawn dish soap to clean makeup brushes? Check out Insider Beauty’s video and explore additional tips for cleaning makeup brushes using common household items:


How to Dry Makeup Brushes?


Makeup brushes should initially be towel-dried with a gentle motion that aligns with the natural position of the bristles. Then, reshape the makeup brushes’ bristles to their like-new shape. Use a special makeup air-drying rack for additional drying, or place them flat on clean towel. The brushes should not be dried in an upright position.


How to Clean Makeup Sponges


Makeup sponges are used to apply liquid foundation, blushes and other wet makeup products. Wet products will dry on the sponges if they are not cleaned immediately after use. This results in a buildup of dead skin cells, skin oils, pigments and other elements.


How to Clean Makeup Brushes Cleanzen Image of Used Make Up Sponges


After each use, use a makeup remover towelette to gently clean the brushes. Another option is to spray a brush cleaning product on the bristles, such as Cinema Secrets Makeup Brush Cleaner Spray. Then, rinse the sponges until the water runs clear. Squeeze the sponges a few times while the water runs over them to remove more of the products.


How to Store Makeup Brushes


How you store your makeup brushes is just as important as how well and regularly you clean them. If brushes are stored in an open container, they could get covered with fine layers of dust and dirt. Later, when using the brushes, these elements may transfer to your skin, potentially causing an acne breakout.


Always use a clean, dry and enclosed container to store your brushes. Some options are an acrylic makeup organizer or a clean makeup bag. Do not comingle dirty and clean makeup brushes.


FAQs


What Not to Do When Cleaning Makeup Brushes?


Cleaning your makeup brushes properly can help you to get years of use out of them while safeguarding the health of your skin. However, improper cleaning can ruin your brushes. You should never run them under the tap with the bristles facing upward. You should also never allow them to dry standing up. In addition, avoid using rich shampoos and harsh cleaning products.


Can You Use Rubbing Alcohol to Clean Makeup Brushes?


The bristles on your makeup brush are delicate and can easily become damaged if they are cleaned with harsh products. For this reason, you should never use rubbing alcohol to clean makeup brushes.


When Is It Time to Throw Away a Makeup Brush?


How to Clean Makeup Brushes Cleanzen Image of a Woman Carrying a Bunch of Make Up Brushes


You can optimize the life and performance of your makeup brushes by keeping them clean. However, there will come a time when the brushes should be replaced. If you notice bristles falling out or fraying, a replacement is needed.


You may also need to throw out your brushes if the gunk cannot be removed by cleaning them, if the bristles cannot be reshaped after cleaning or if they develop an unpleasant smell.


Staying on top of all of the cleaning chores around the house is both time-consuming and exhausting, and these household chores can leave you with little time to clean makeup brushes and tend to other important tasks. With apartment cleaning service Boston, you can enjoy a cleaner space with minimal time and effort.

The post How to Clean Makeup Brushes appeared first on Cleanzen.


from Cleanzen https://cleanzen.com/blog/how-to-clean-makeup-brushes/
via IFTTT

Thursday, 18 January 2024

The Best Way to Clean Cast Iron Skillet & Pans

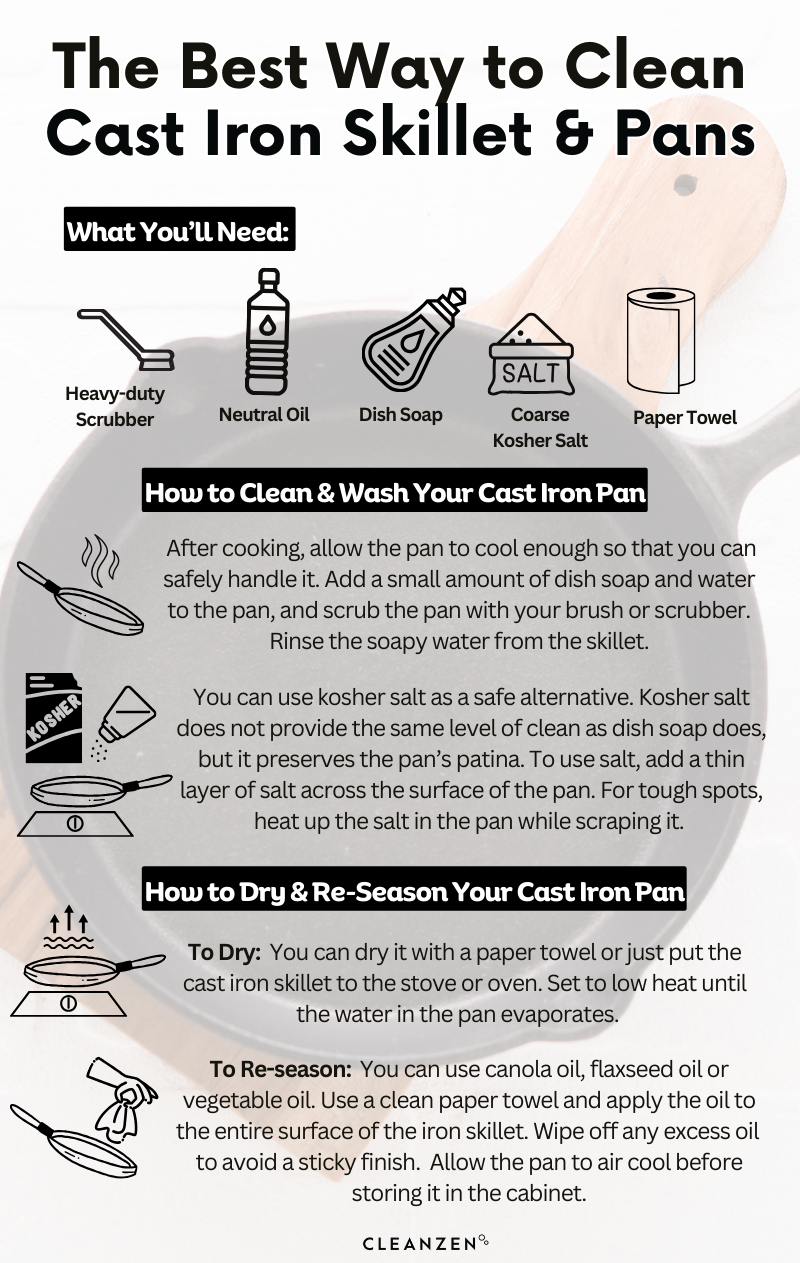
The Best Way to Clean Cast Iron Skillet & Pans Cleanzen Infographic


A cast iron skillet has several excellent properties, including an extensive lifespan. Other benefits include the ability to hold heat well, a non-stick surface and a sturdy design. However, there are also a few drawbacks to using a cast iron pan. These include the development of rust on the pan and the potential for the food remnants to stick and build up.


Cleaning a cast iron skillets to remove food remnants and rust is easy to do, but it is also different from cleaning other types of pans. When you know how to clean a cast iron skillet, you can continue enjoying all that your cast iron pan offers for decades.

How to Clean a Cast-Iron Skillet


The Best Way to Clean Cast Iron Skillet & Pans Cleanzen Image of Cast Iron Pan Placed Inside the Oven


Properly caring for your cast iron cookware protects it from rusting and build-up. It can also promote more flavorful food. While it is easy to clean your cast iron pan, proper steps should be followed to avoid damaging it.


1. Before you start cleaning your cast iron skillet, pull out the necessary supplies. These include a heavy-duty cast iron scrubber as well as neutral oil, dish soap, coarse kosher salt and paper towels.


A common neutral oil that may be in your pantry is vegetable oil. Examples of a safe scrubber to use on cast iron surfaces are a scrubber or a dish brush with stiff bristles. Do not use a stainless-steel scouring pad or steel wool as these are too abrasive and can strip the pan.


2. After cooking with the pan, allow it to cool enough so that you can safely handle it. Add a small amount of dish soap and water to the pan, and scrub the pan with your brush or scrubber. Rinse the soapy water from the skillet.


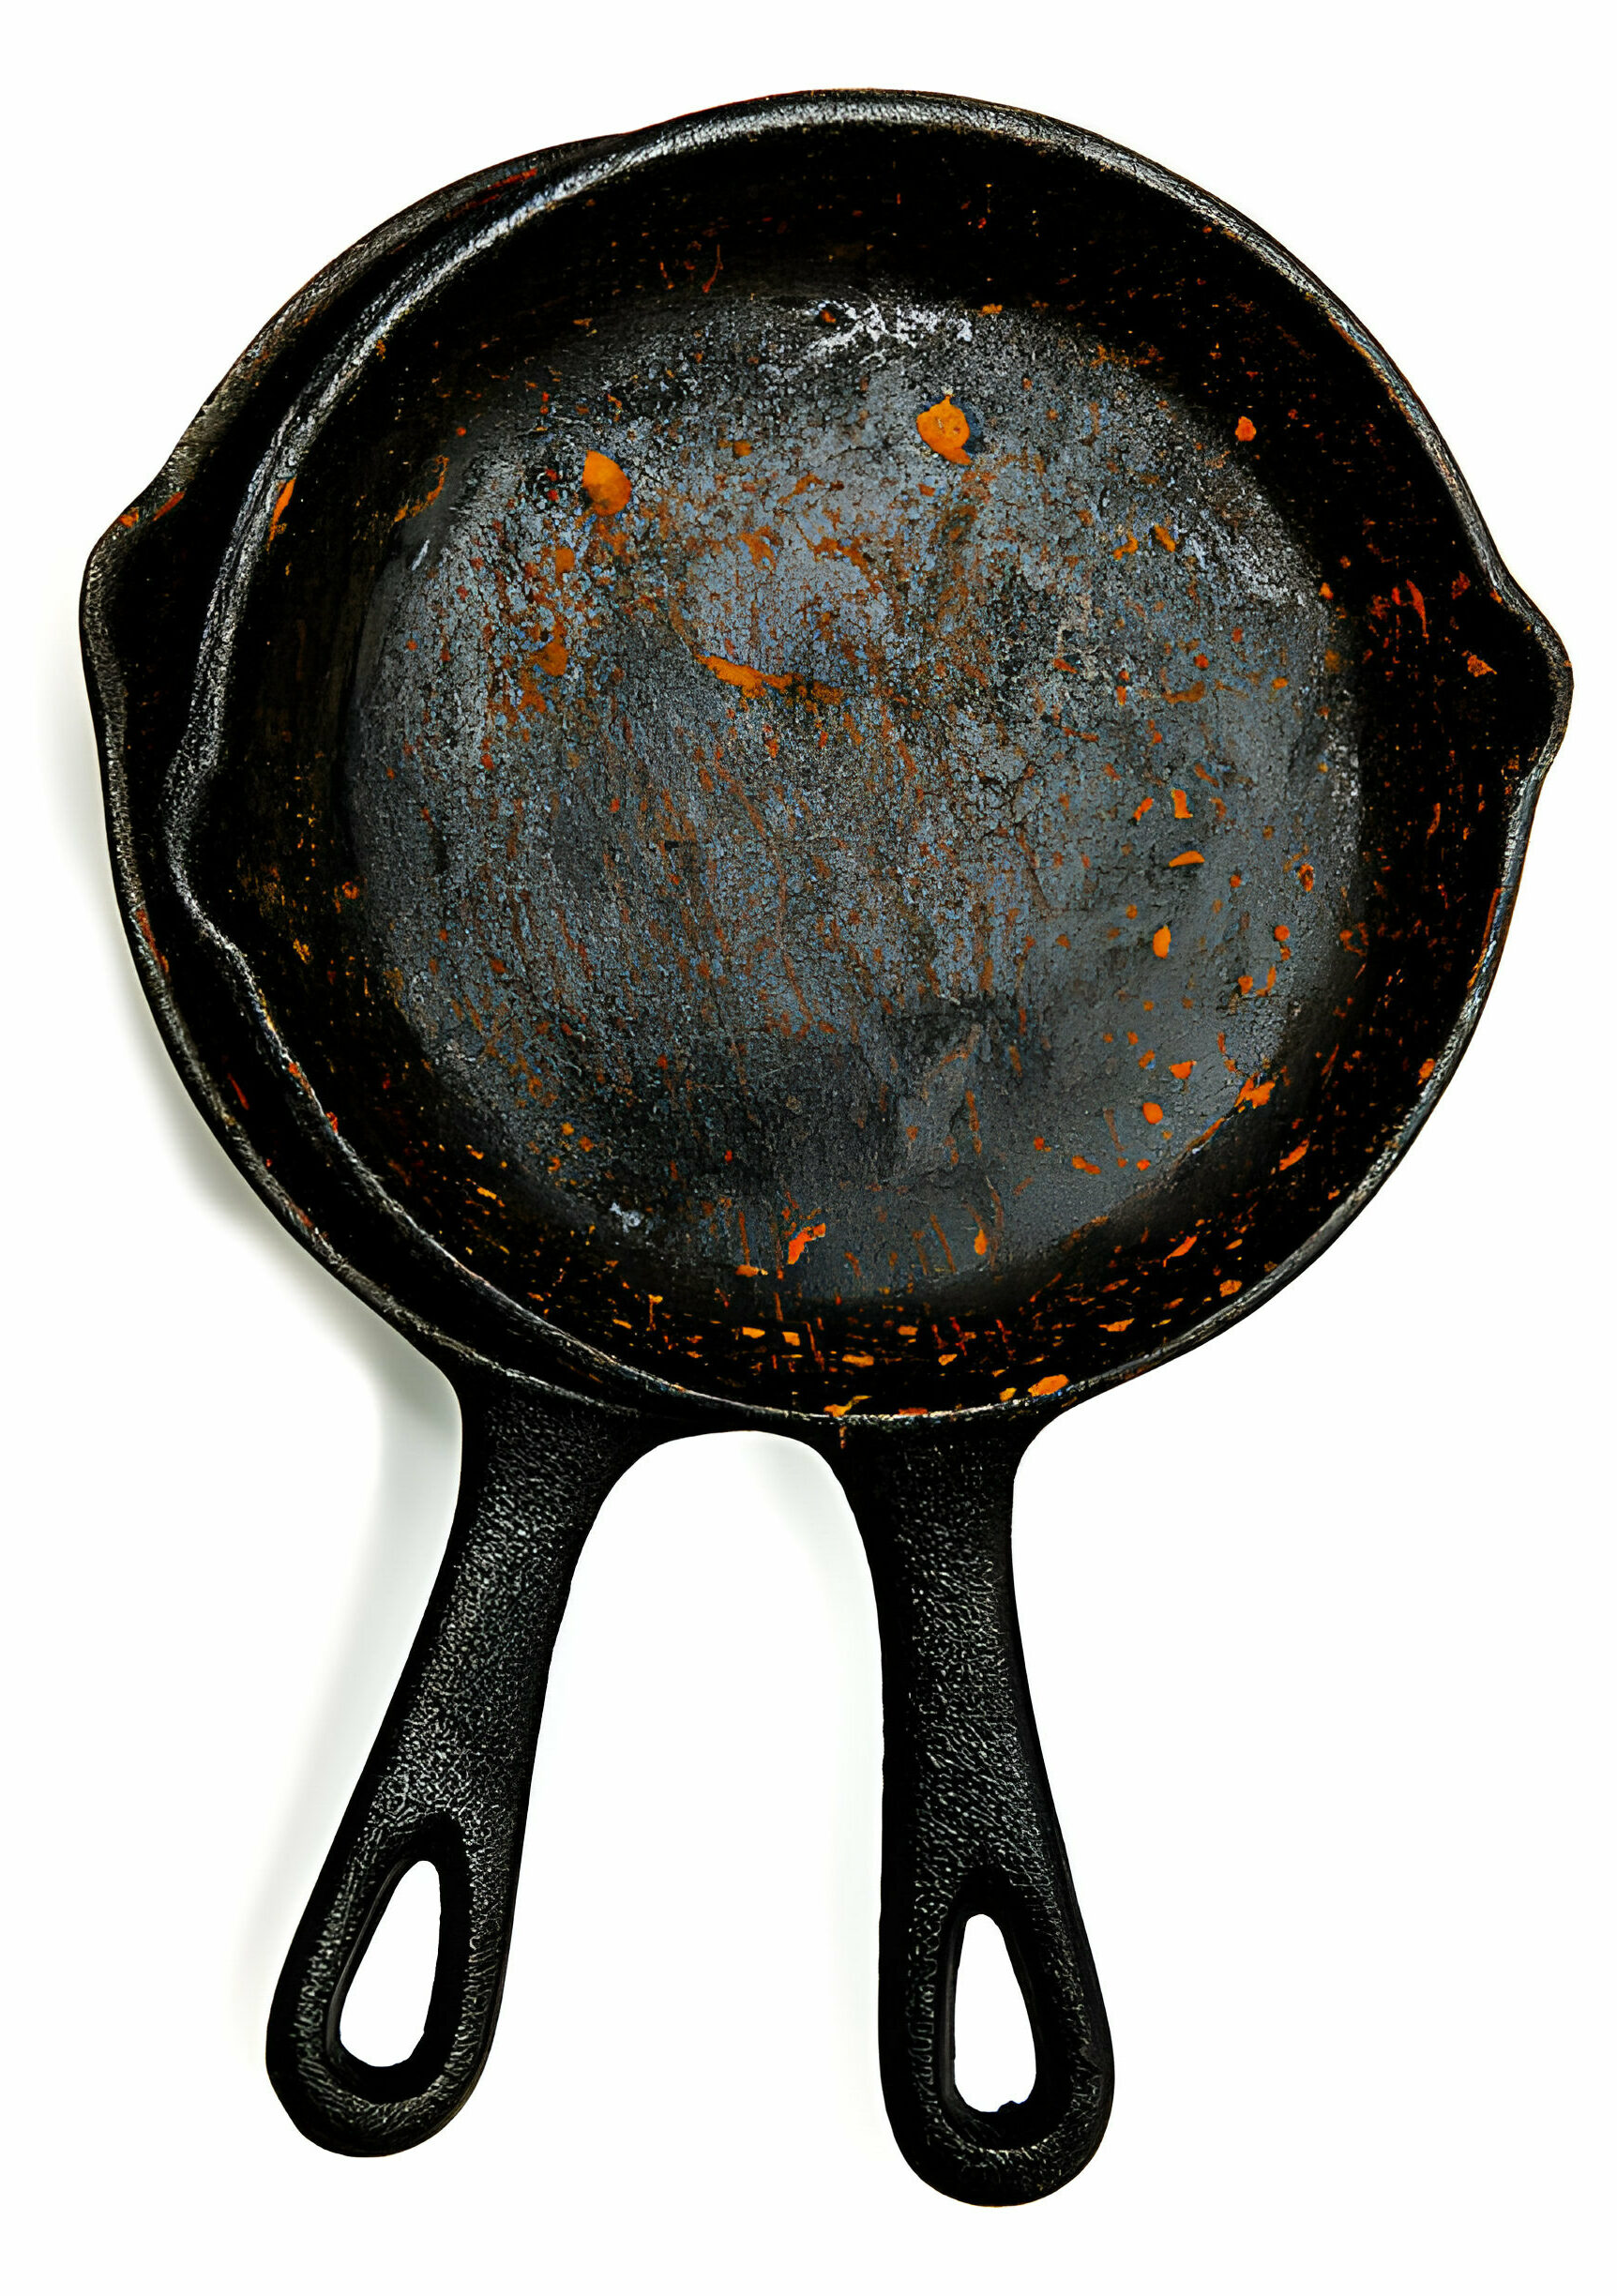
Rather than using dish soap, you can use kosher salt as a safe alternative. Kosher salt does not provide the same level of clean as dish soap does, but it preserves the pan’s patina. To use salt, add a thin layer of salt across the surface of the pan.The Best Way to Clean Cast Iron Skillet Pans Cleanzen Image of a Dirty Cast Iron PanUsing a spatula, scrap off the stuck-on food bits. For tough spots, you can add hot water or heat up the salt in the pan while scraping it. When the food particles are gone, you can continue to the next step.
 

3. Return the cast iron skillet to the stove. Heat the water in the pan until it has evaporated. Then, remove the skillet from the heat.


4. Re-season and dry your skillet using the steps below. Your skillet will then be ready for its next use.


How to Dry and Store a Cast-Iron Skillet


Your cast iron skillet should be completely dry before it is stored back in your kitchen cabinet. After washing, rinsing and re-seasoning the pan, wipe it with a paper towel. Absorb as much of the moisture as possible. Allow the skillet to continue drying on your counter overnight.


How to Re-Season the Pan After Cleaning


The re-seasoning process for a cast iron skillet is a process that binds clean oil to the cooking area. To start the re-seasoning process, heat the pan up as hot as possible.


Not sure what kind of oil should you use to season your cast iron pan? You can use neutral oils like canola oil, flaxseed oil or vegetable oil. To apply the oil to the cast iron pan, use a clean paper towel. The entire surface of the iron skillet should be coated. Remember to use an oven mitt to handle the hot skillet.


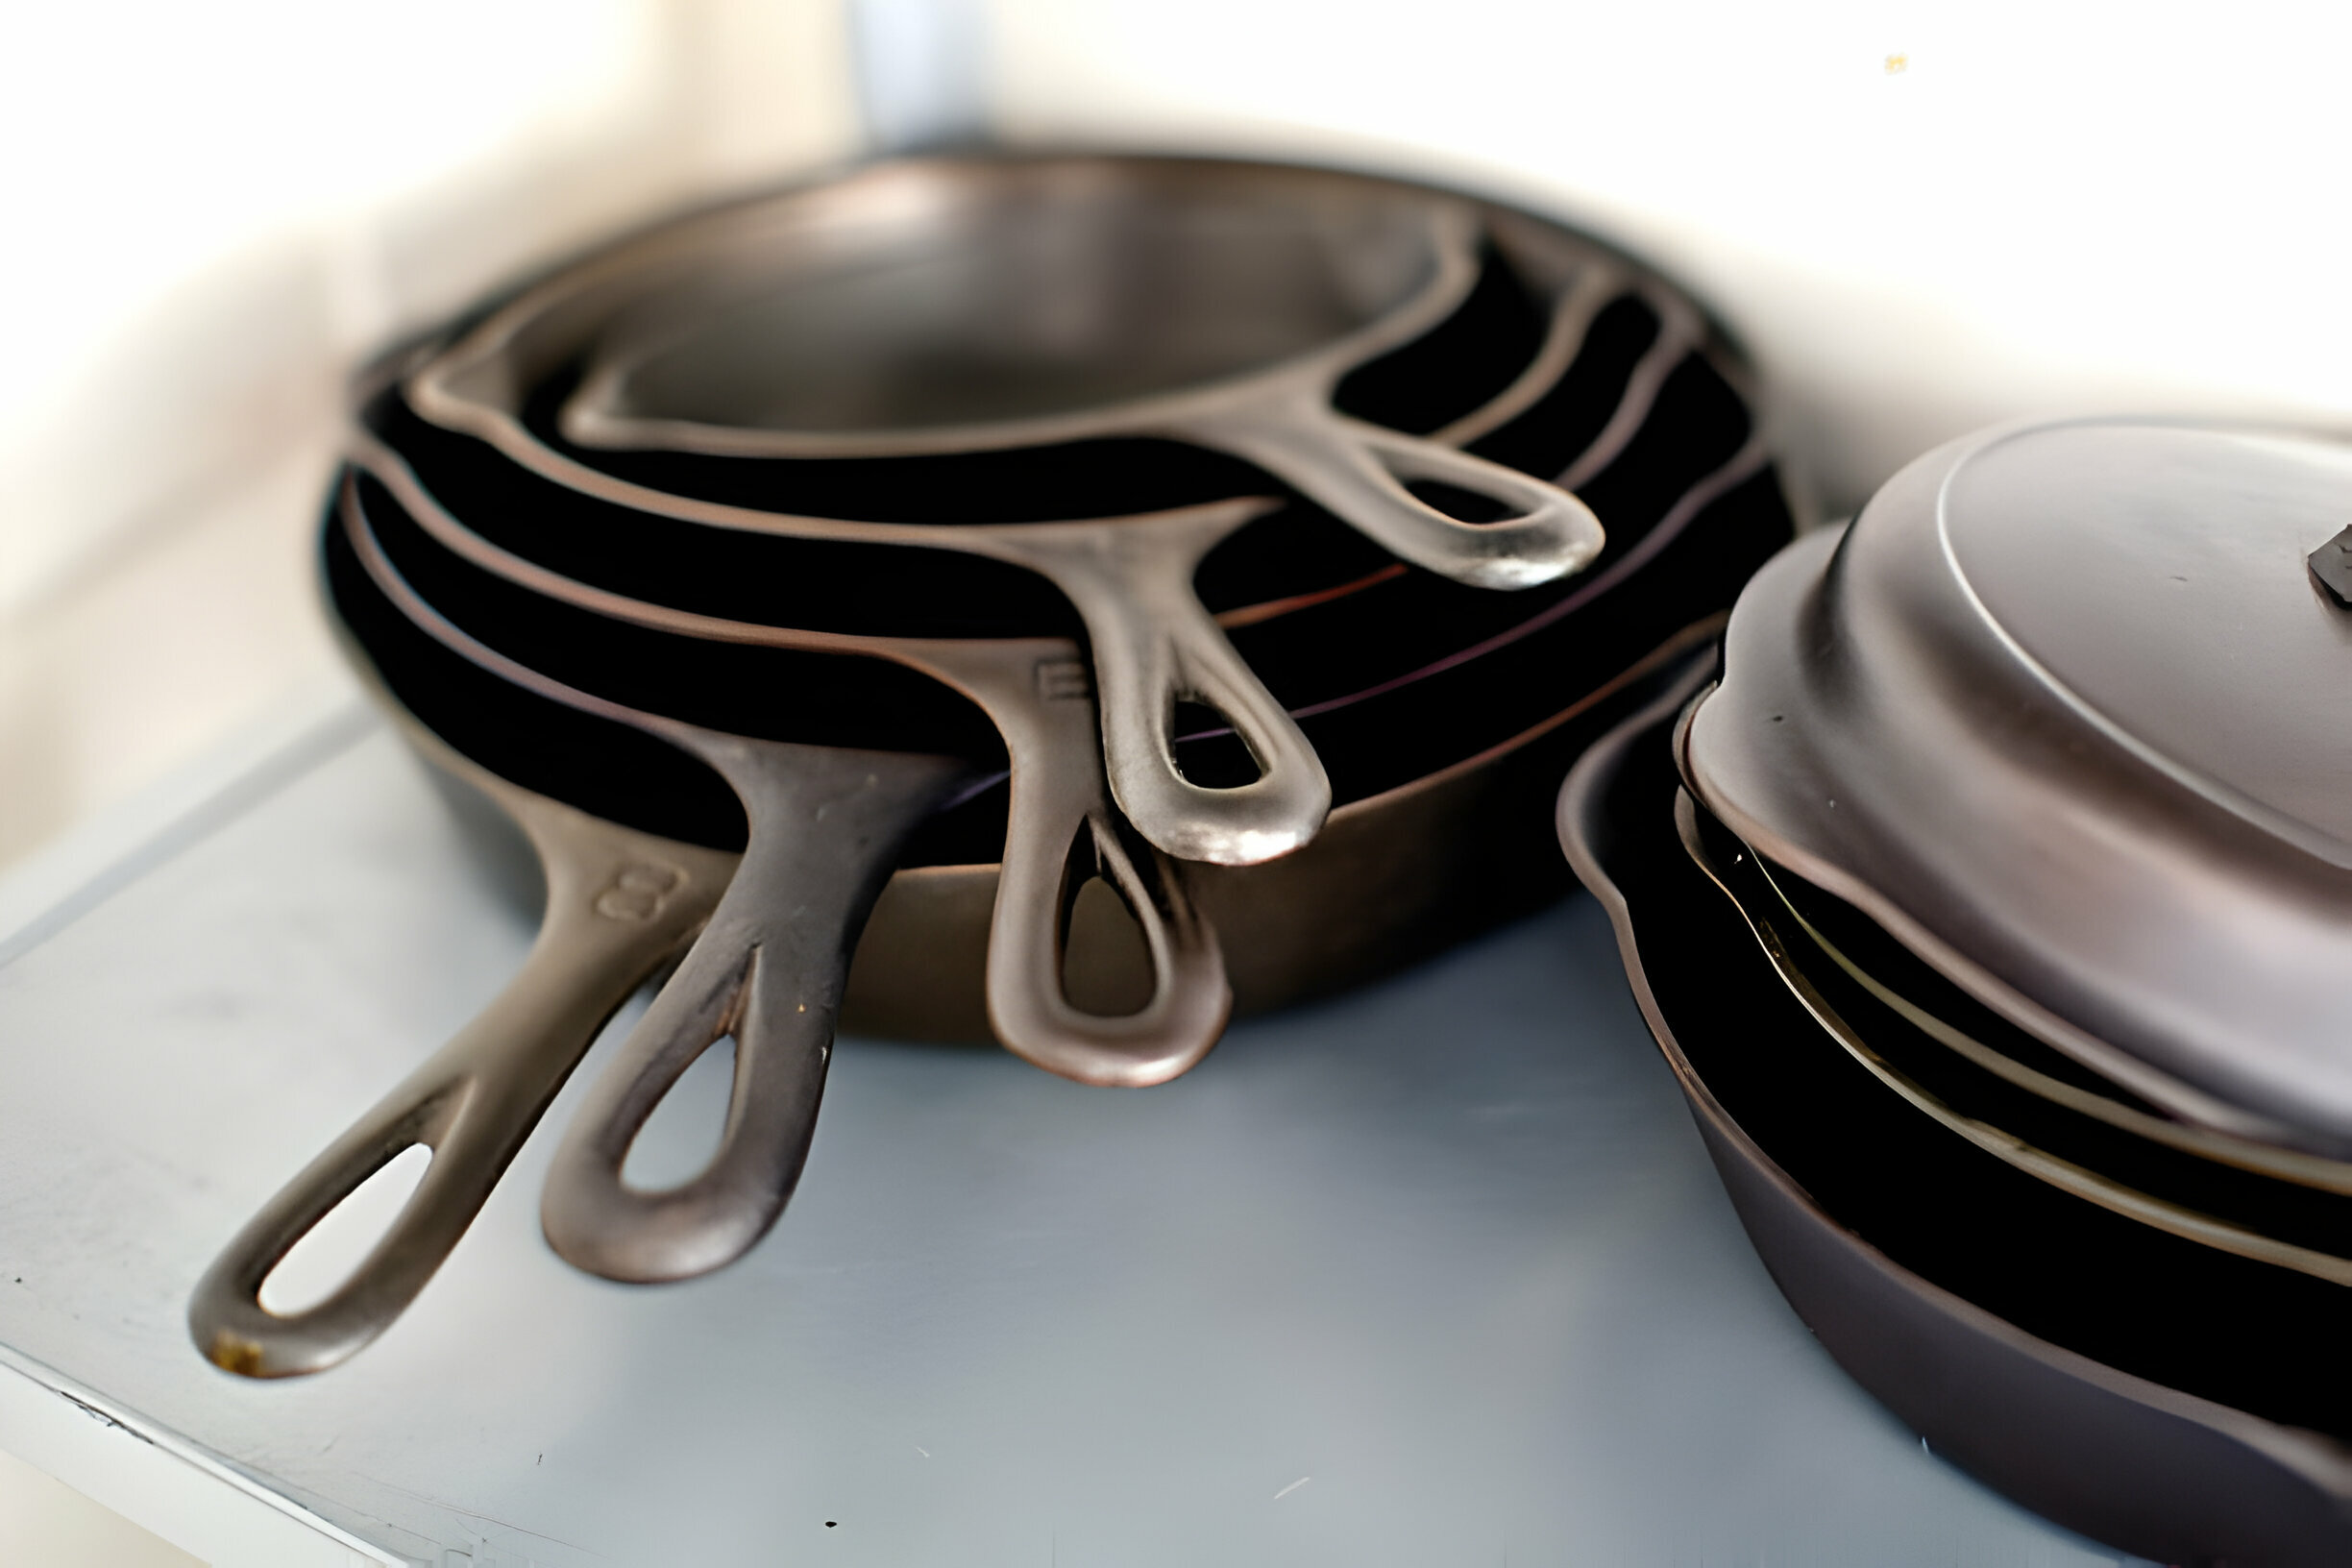
The Best Way to Clean Cast Iron Skillet & Pans Cleanzen Image of Cast Iron Pans Stacked Together


To complete the re-seasoning process, use a paper towel to wipe away the excess oil. Do not allow too much oil to remain in the pan as this can create a mess with the next use. Allow the pan to air cool before storing it in the cabinet. Keep in mind that this process may need to be repeated several times if the pan has been completely stripped.


How to Clean a Rusty Cast Iron Skillet


If your cast iron skillet is coated with rust, you may be inclined to think that it needs to be thrown out. However, removing rust from a cast iron pan is an easy process. In fact, you may be able to remove the rust following the previously outlined cleaning steps.


If the rusty part of your cast-iron skillets is not fully removed by cleaning it, you can swap out the brush or scrubber with a stainless-steel chain-mail scrubber or a non-metallic scrubber. After removing rust, you should follow the steps for cleaning, drying and re-seasoning the pan.


FAQs


Can I wash my cast iron with soap? What is the best solution to clean cast iron?


Yes, your cast iron skillet can easily be cleaned with dish soap and warm water. Any type of mild dish soap will suffice. An alternative to washing the pan with dish soap and water is to use kosher salt. Kosher salt can effectively remove the grime on the pan and protect the patina, but it may not provide the same deep level of clean that dish soap does.


Discover additional care tips for your cast iron by watching the Epicurious video below.


Can I put my cast iron pan in the dishwasher?


A cast iron pan is not dishwasher-safe. Common dishwasher detergents have harsh agents that strip away the protective coating on the pan. It takes a long time for the non-stick surface to build up, so even one pass through the dishwasher can impact the skillet’s performance for months. In addition, using a dishwasher to clean the cast iron skillet makes it more vulnerable to rusting.


Can I soak my cast iron pan in water to soften up burnt-on food before I wash it?


No. When your cast iron pan is exposed to water for longer periods of time, it is more likely to develop rust. Because of this, you should not soak your pan. Instead, use soap and water method or salt and water as well as heat from the stove to more quickly clean the pan. The pan should be immediately rinsed, seasoned and dried after using water to clean it.


If the new skillet claims to be pre-seasoned, do I still have to season it?


A pre-seasoned pan is one that has had polymers applied to it by the manufacturer. These polymers protect the cast iron skillet from rusting. You will still need to season it with light layers of oil over time. Well-seasoned cast iron skillets to maintain its appearance and cooking capabilities.


You can learn other tricks and tips through our blog. New posts are added regularly with effective cleaning hacks for surfaces across your home. We also offer deep cleaning services in Boston that can deliver the thorough cleaning your home or apartment needs regularly. Our team is available to answer your questions about our services. We are thrilled to help you keep your home clean throughout the year!

The post The Best Way to Clean Cast Iron Skillet & Pans appeared first on Cleanzen.


from Cleanzen https://cleanzen.com/blog/how-to-clean-a-cast-iron-skillet/
via IFTTT

Wednesday, 17 January 2024

The Easy Way to Clean a Microwave

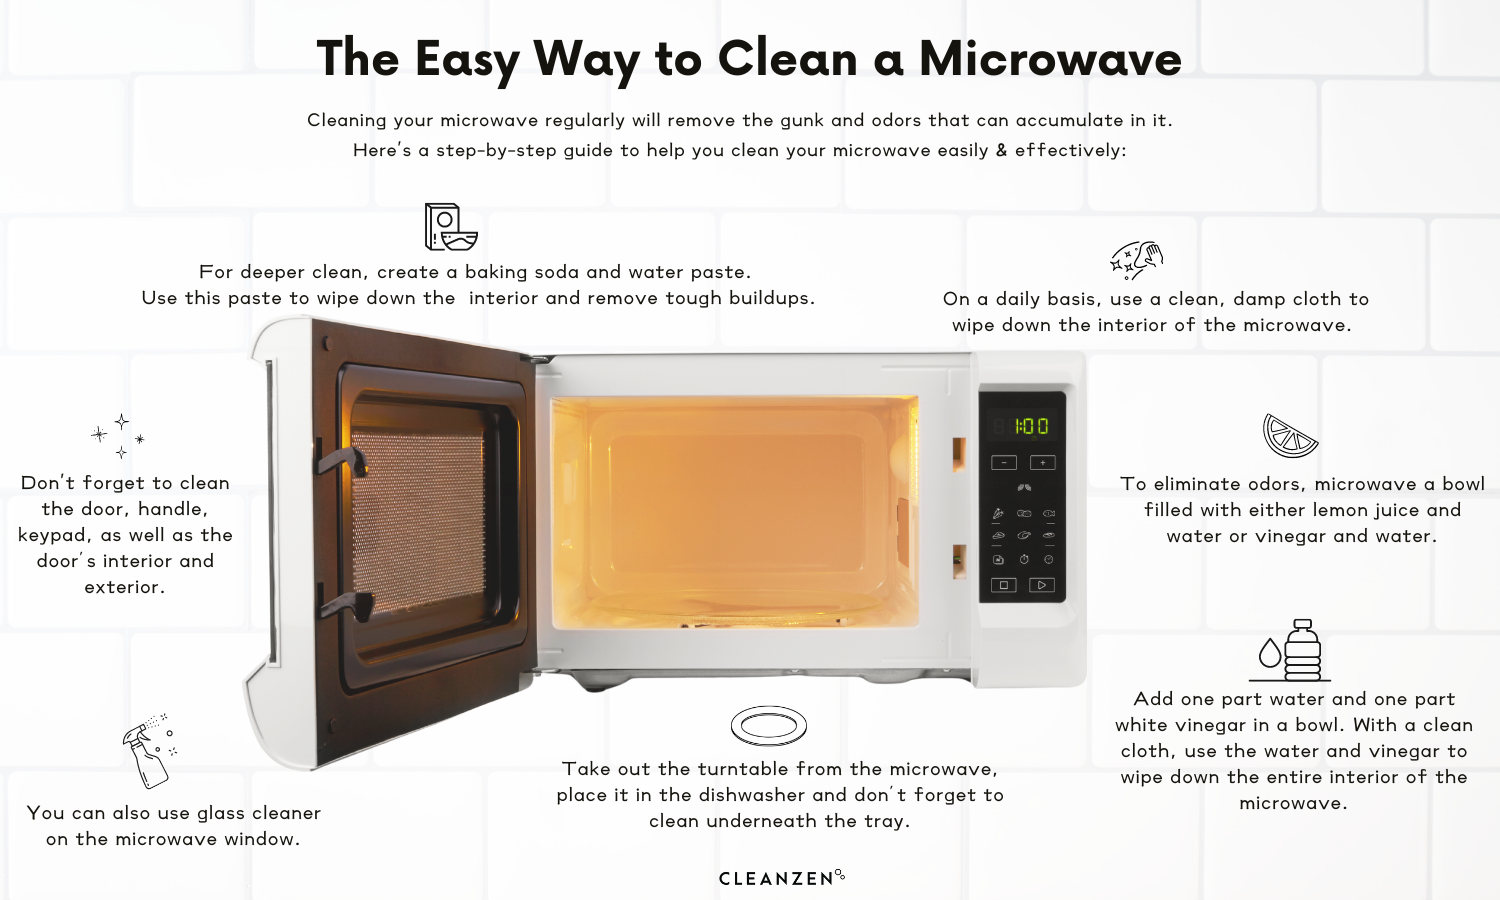
The Easy Way to Clean a Microwave Cleanzen Infographic


Your microwave is undeniably a time-saving convenience, allowing you to cook a variety of foods and beverages in minimal time. However, many of the foods that you commonly put in your microwave can leave remnants.


For example, oatmeal and cereal could boil over, mashed potatoes may explode, bread products may leave crumbs behind and more. Items like popcorn, bacon and others can produce lingering odors.


Cleaning your microwave regularly will remove the gunk and odors that can accumulate in your microwave.

How Often Should You Clean Your Microwave?


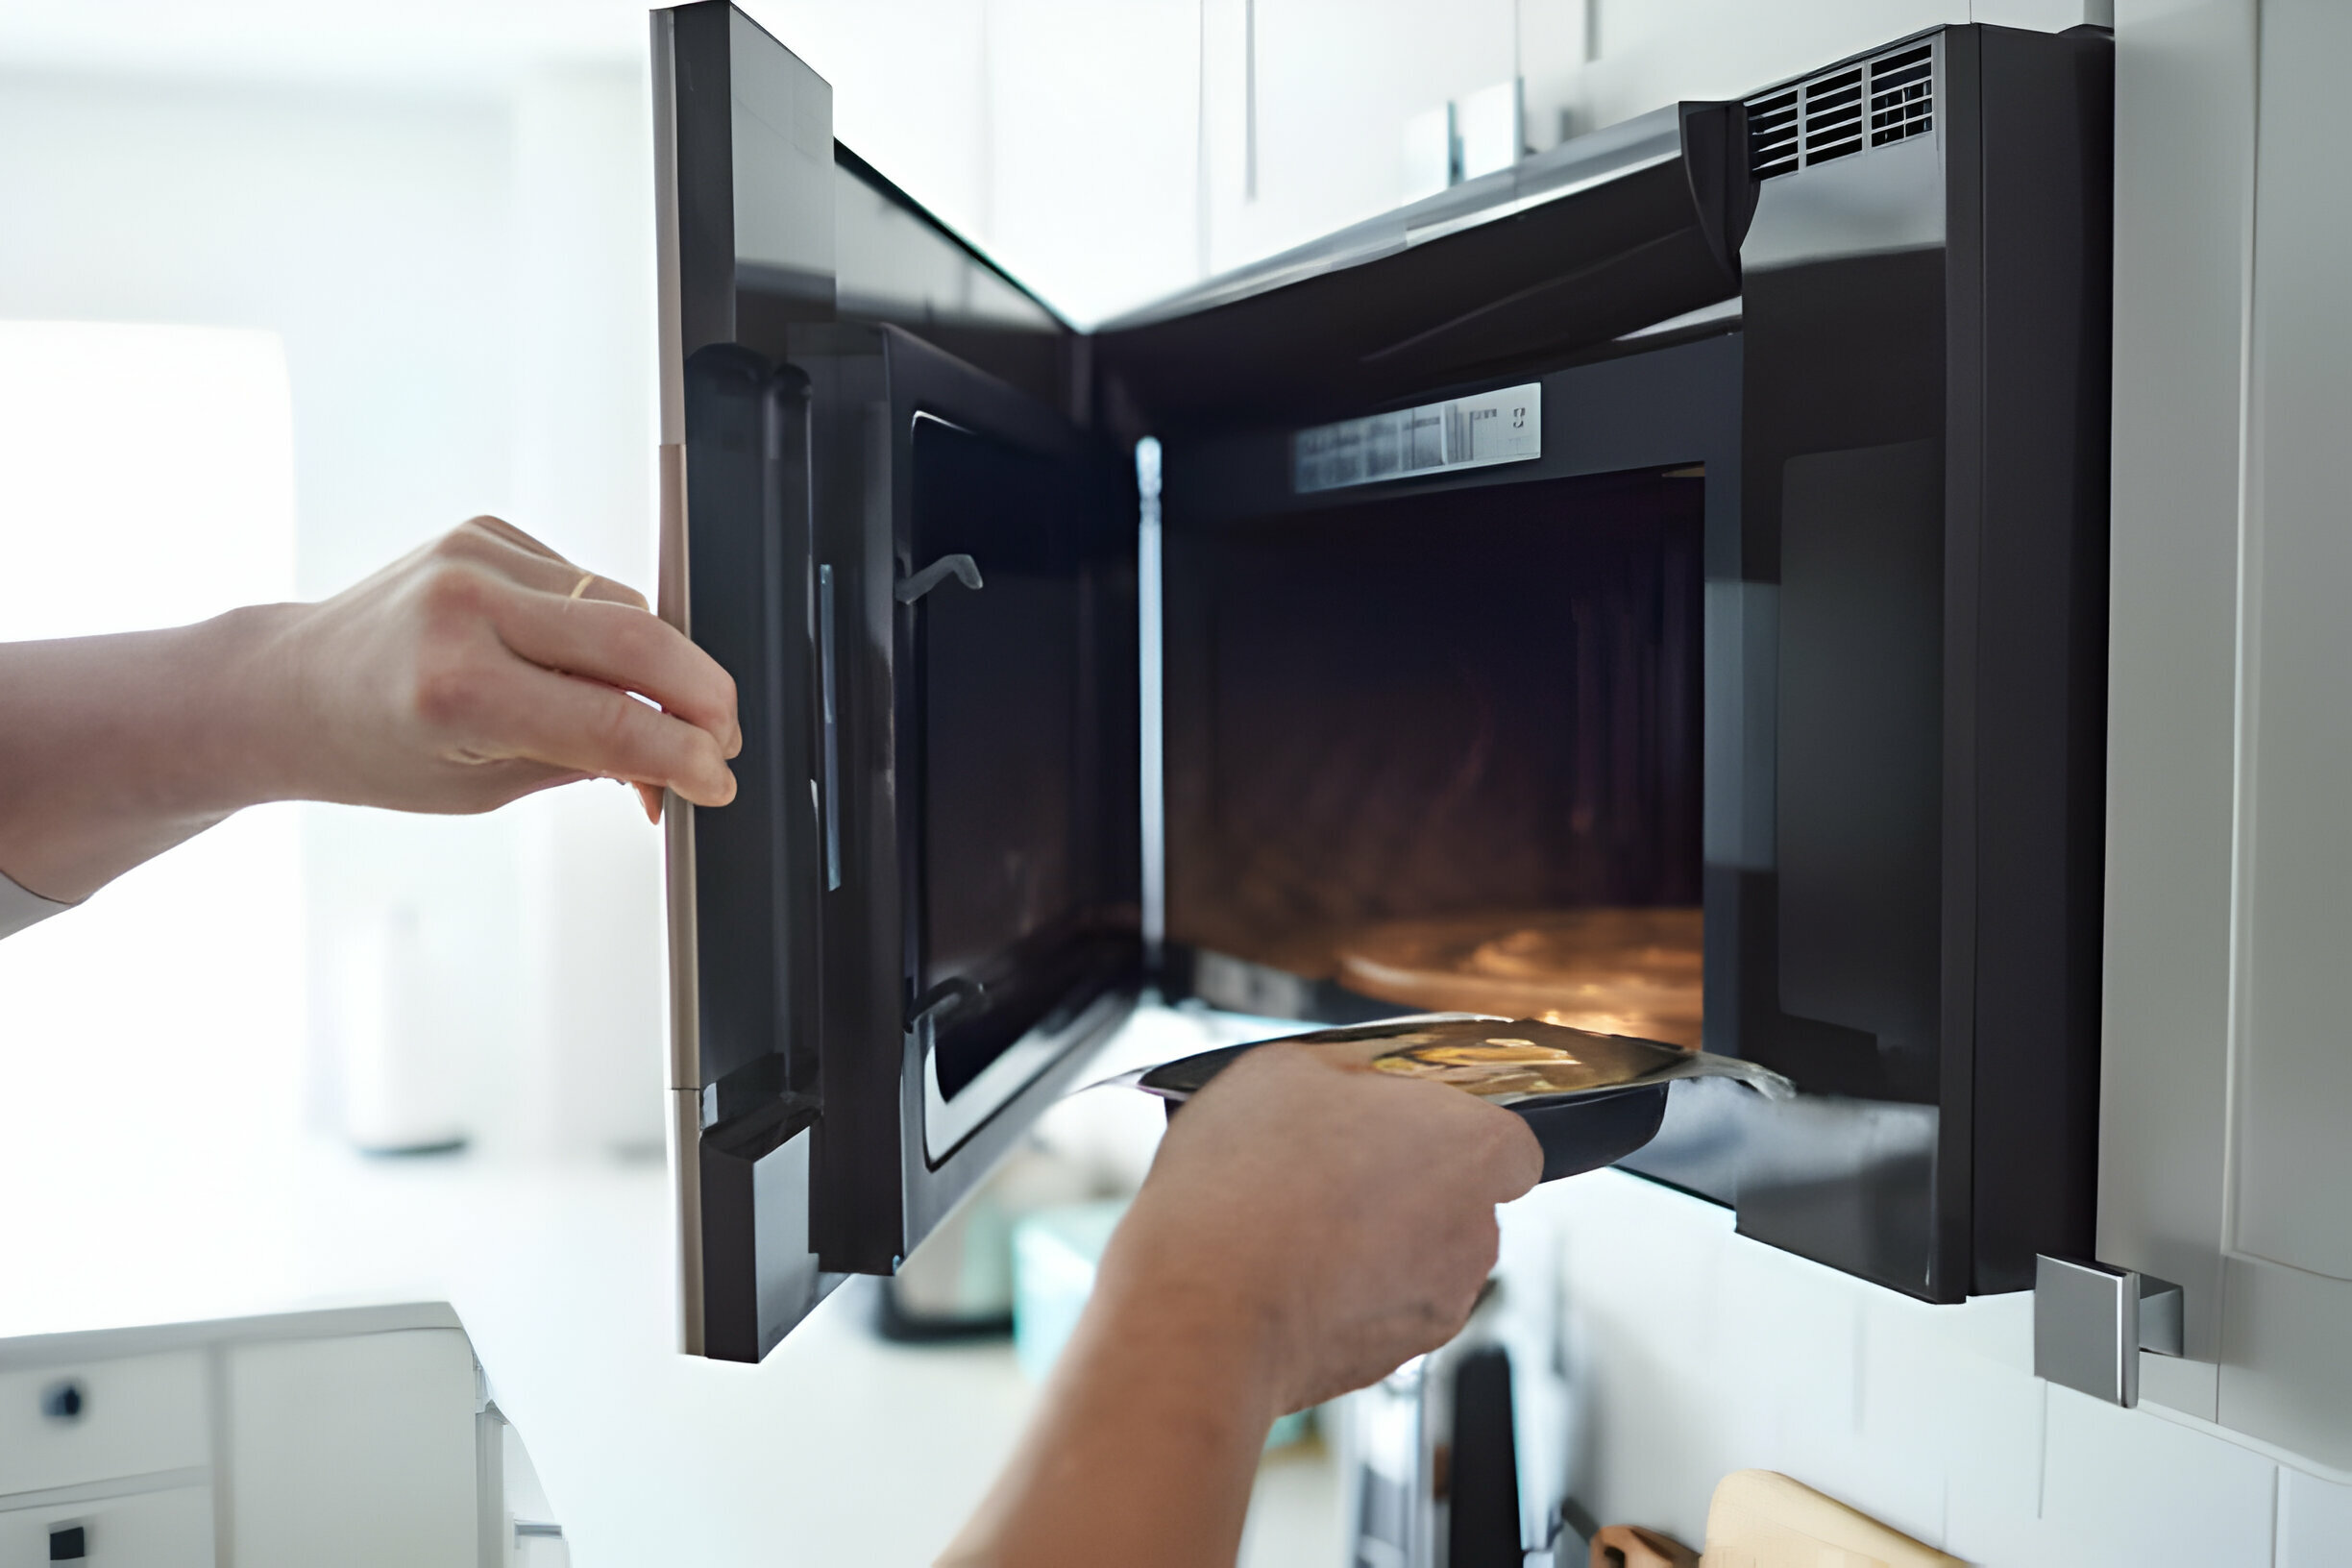
the Easy Way to Clean a Microwave Cleanzen Image of a Person Using a Microwave


The dirt and debris in a microwave can build up over time. Liquids and cheese will harden, making them more difficult to remove later. This is particularly true when they have been cooked onto the microwave’s interior surfaces with continued use of the appliance.


Simply wiping down the microwave daily can eliminate the messes and prevent cooked-up buildup that is difficult to remove. It is best to wipe up liquid spills immediately and before they have a chance to harden.


Deep cleaning your microwave is also recommended. The ideal frequency for a deep clean is between one to four weeks. If many people in your home use the microwave regularly, the recommended frequency is closer to one week. You can conveniently remember to deep clean the microwave after your regular cleaning service.


How to Remove Odors from a Microwave


Unpleasant odors can emanate from your microwave, filling your entire home with strong, undesirable smells. Eliminating these odors is an easy process that can be accomplished within minutes. Add 1 cup water and 1cup white vinegar in a microwave-safe bowl. With a clean cloth, use the water and vinegar to wipe down the entire interior of the microwave. If smells continue to linger, place a small bowl of pure vinegar next to your microwave for several hours.


How to Clean a Microwave?


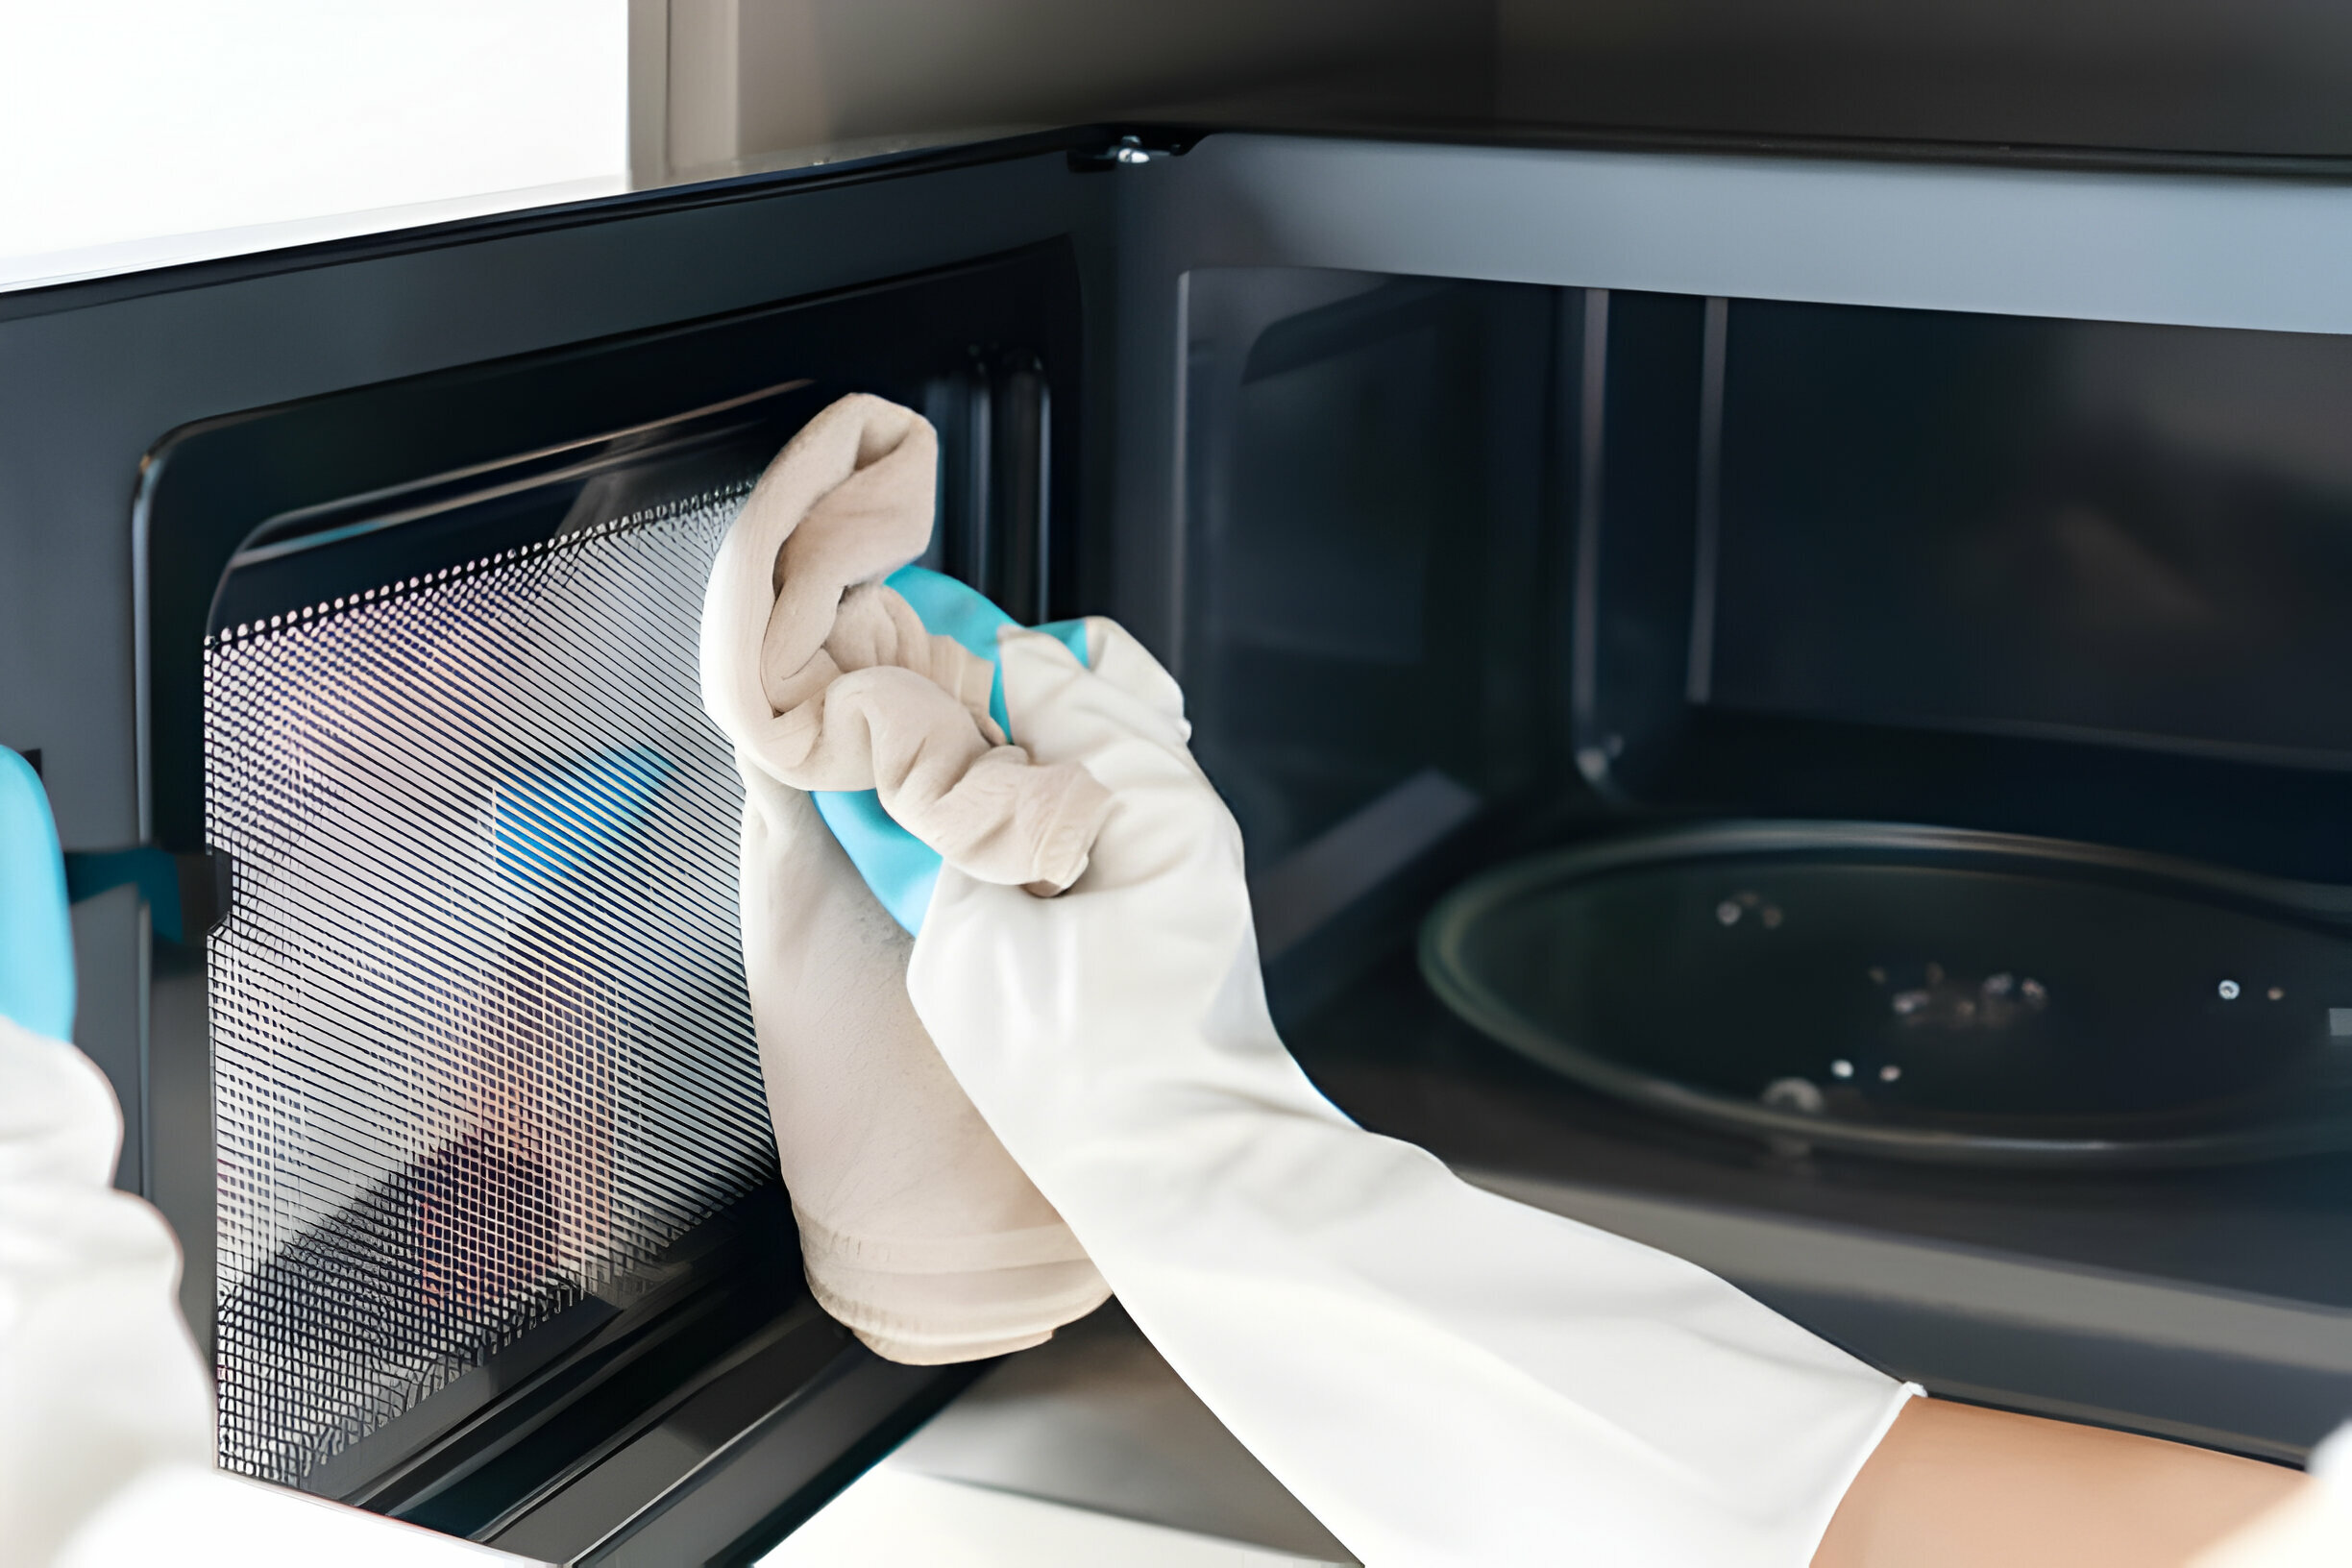
The Easy Way to Clean a Microwave Cleanzen Image of a Person Cleaning the Inside of a Microwave


How do you clean the inside, turntable and outside of a microwave? On a daily basis, use a clean, damp cloth to wipe down the interior of the microwave. Remember to clean the top of the microwave where splatters may have reached. Then, place the turntable tray in the dishwasher. Clean underneath the tray.


Then, turn your attention to the microwave door, focusing on the handle as well as the door’s interior and exterior. Remember to wipe down the keypad as well. If you have a stainless steel microwave, use a special cleaning product for this type of surface. You can also use glass cleaner on the microwave window.


For a deeper clean every few weeks, create a baking soda paste with water and baking soda. Use this paste to wipe down the interior and remove tough buildups. If the stuck-on buildup remains, you may need to scrape it off with a knife first. Then, use a mixture of water and white vinegar to wipe down the microwave’s interior a second time.


To address the matter of odors, place a bowl of either fresh lemon wedges or white vinegar with water in the microwave. Allow the microwave to run for several minutes.


How Do You Clean a Microwave Filter?


Every microwave has a filter, and this filter will grow increasingly dirty as you use the appliance. It should be cleaned as frequently as you deep-clean the microwave. Each microwave model has unique cleaning instructions, and these should be followed.


Generally, however, the process involves removing the filter and putting it in hot, soapy water for several minutes. After the filter is soaked, you can scrub it gently, rinse it and reinstall it.


FAQs


What Is the Easiest Way to Clean a Microwave?


The easiest way to clean your microwave daily is to wash the turntable in the dishwasher regularly. This can be followed by wiping down the interior with a damp cloth that holds both baking soda and water. You can prevent stubborn buildups by doing so, and this makes deep cleaning sessions easier to do.


When deep-cleaning a microwave, use a thick paste of baking soda and water to scrub down the microwave’s interior. After rinsing it and using white vinegar and water to wipe it down again, you can focus on odors. Microwave a bowl filled with either lemon juice and water or vinegar and water. Each time you deep clean the microwave, you should also soak and clean the filter.


Check out this fast and simple hack that takes less than five minutes to clean your microwave using only vinegar and water:


Is It Better to Clean a Microwave with Lemon or Vinegar?


Both lemon and vinegar have acidic properties and are effective at cutting through grease and grime built up on the interior of the microwave. They can also cut odors, leaving your microwave smelling fresh and preventing lingering cooking odors from wafting through the house. Because the products are relatively comparable, the decision to clean with lemon juice or vinegar is the user’s preference.


What Not to Do When Cleaning a Microwave?


Cleaning a microwave can be labor intensive if you are dealing with cooked-on grime. Generally, however, the process is fast and straightforward if cleaning is done regularly. When cleaning your microwave, ensure that you wipe away the baking soda or vinegar that you used to clean it. Avoid using bleach, bleached based disinfecting wipes and other potentially harmful cleaning products in the microwave interior.

The post The Easy Way to Clean a Microwave appeared first on Cleanzen.


from Cleanzen https://cleanzen.com/blog/how-to-clean-a-microwave/
via IFTTT

Tuesday, 16 January 2024

How To Clean a Hairbrush: 4 Steps to Clean a Hairbrush

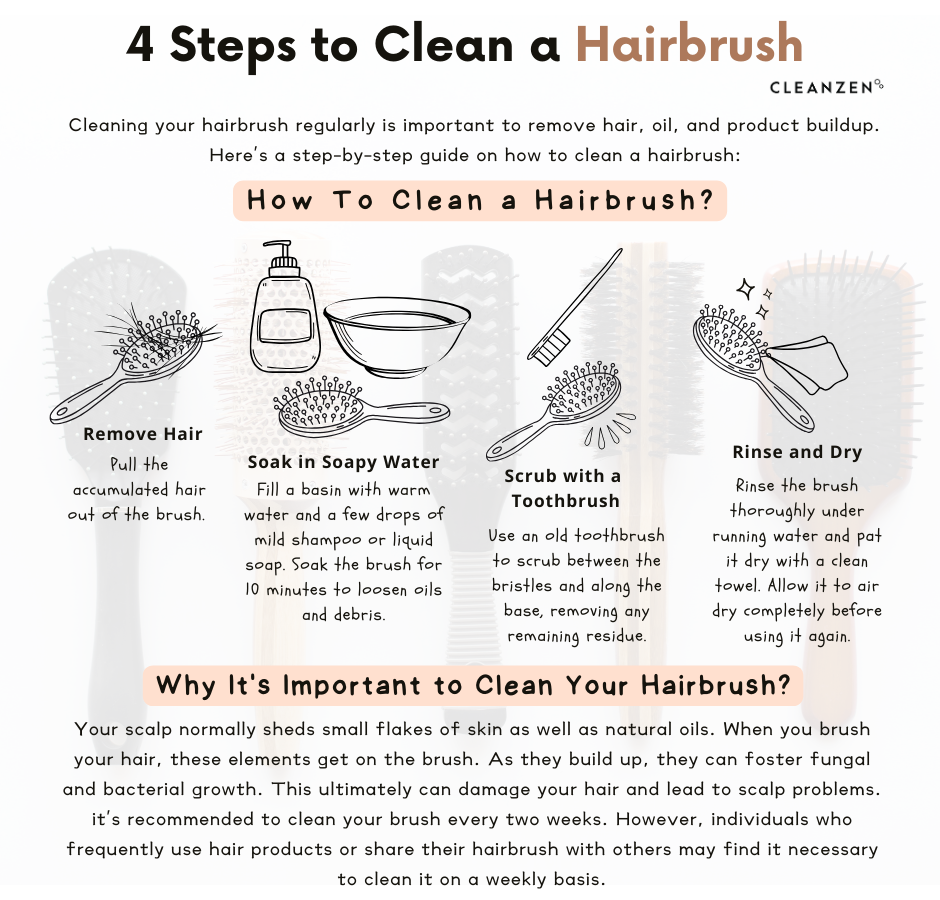
How to Clean a Hairbrush Cleanzen Infographic


Your scalp regularly sheds flakes and secretes oils on a daily basis. These elements as well as dirt and hair products can accumulate as well. When you brush your hair, these elements accumulate on your hairbrush.


The bush then can foster bacterial and fungal growth. This directly impacts the health of your hair and scalp. In order to maintain healthy, beautiful hair you need to remove these elements from your hairbrush. What does it take to properly clean a hairbrush?


Why Is There Gray Fuzz in My Hairbrush?


Over time, you may become aware of an increasing amount of general filth in your hairbrush. This filth may look like gray fuzz, but it isn’t. These small particles are actually made up of product residue, chunks of damaged hair, scalp oil and dead skin.


When the brush isn’t cleaned regularly, these particles can lead to bacterial and fungal growth. These growths directly and negatively hinder the health of your scalp and hair. If you see what appears to be gray fuzz in your brush, it is time to clean your brush.


How Often Should You Clean Your Brushes?


The thought of running bacteria and fungus through your hair with each brush stroke can make you grimace, so you understandably want to clean your hairbrush at timely intervals. Generally, you should clean your brush every two weeks. This may coincide with your regular cleaning service Boston.


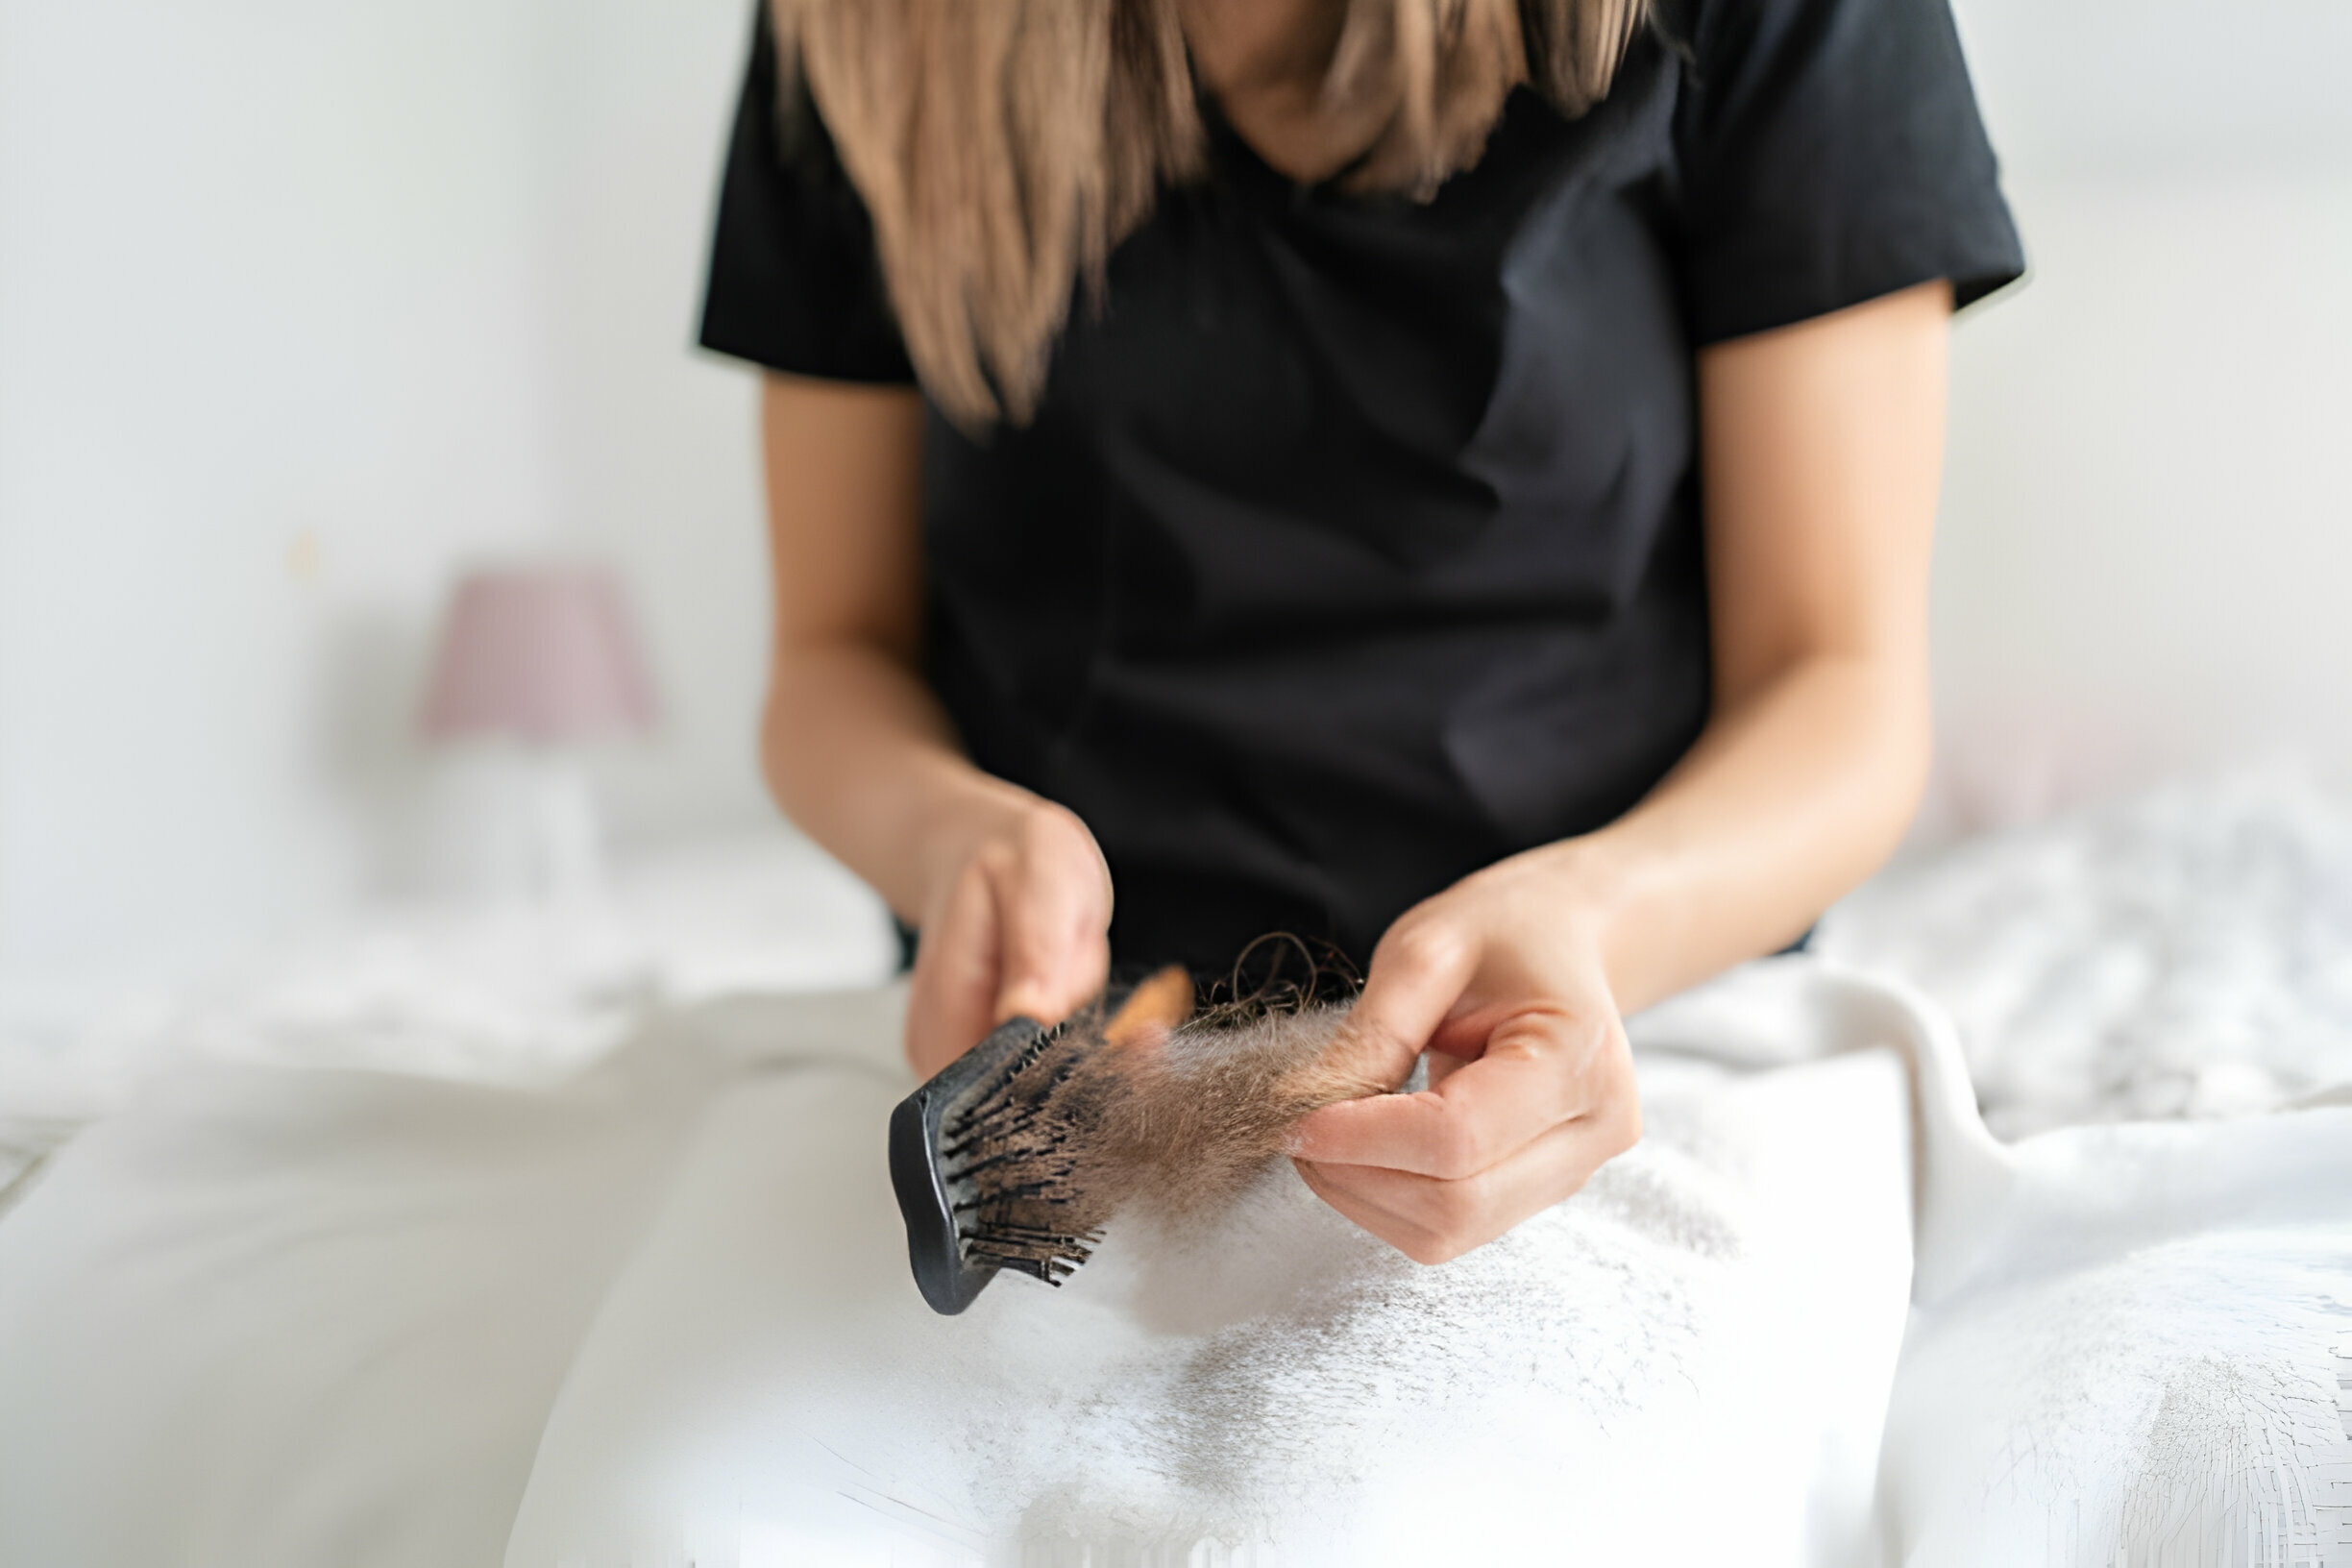
How to Clean a Hairbrush Cleanzen Image of a Woman Removing Hair From Her Hairbrush


However, people who use more hair product or who share their hairbrush with other people may need to clean it every week. By staying on top of this important task, you can get the most life out of your brush and safeguard the health of your hair and scalp.


Steps How to Clean Your Hairbrush Effectively


Cleaning your hairbrush is easy to do, and it can be done with supplies that you likely already have on hand in your home. What are the steps to clean your hairbrush?


1. Gather your supplies. You will need liquid soap, such as body wash, shampoo or dish soap. However, if your hairbrush is made out of wood or natural bristles, you should use a sulfate-free shampoo. You will also need a clean toothbrush, a small towel and a large bowl. It is also helpful to have chopsticks or a comb with a pointed end. To disinfect the brush, you will also need isopropyl alcohol and cotton swabs or a disinfecting spray.


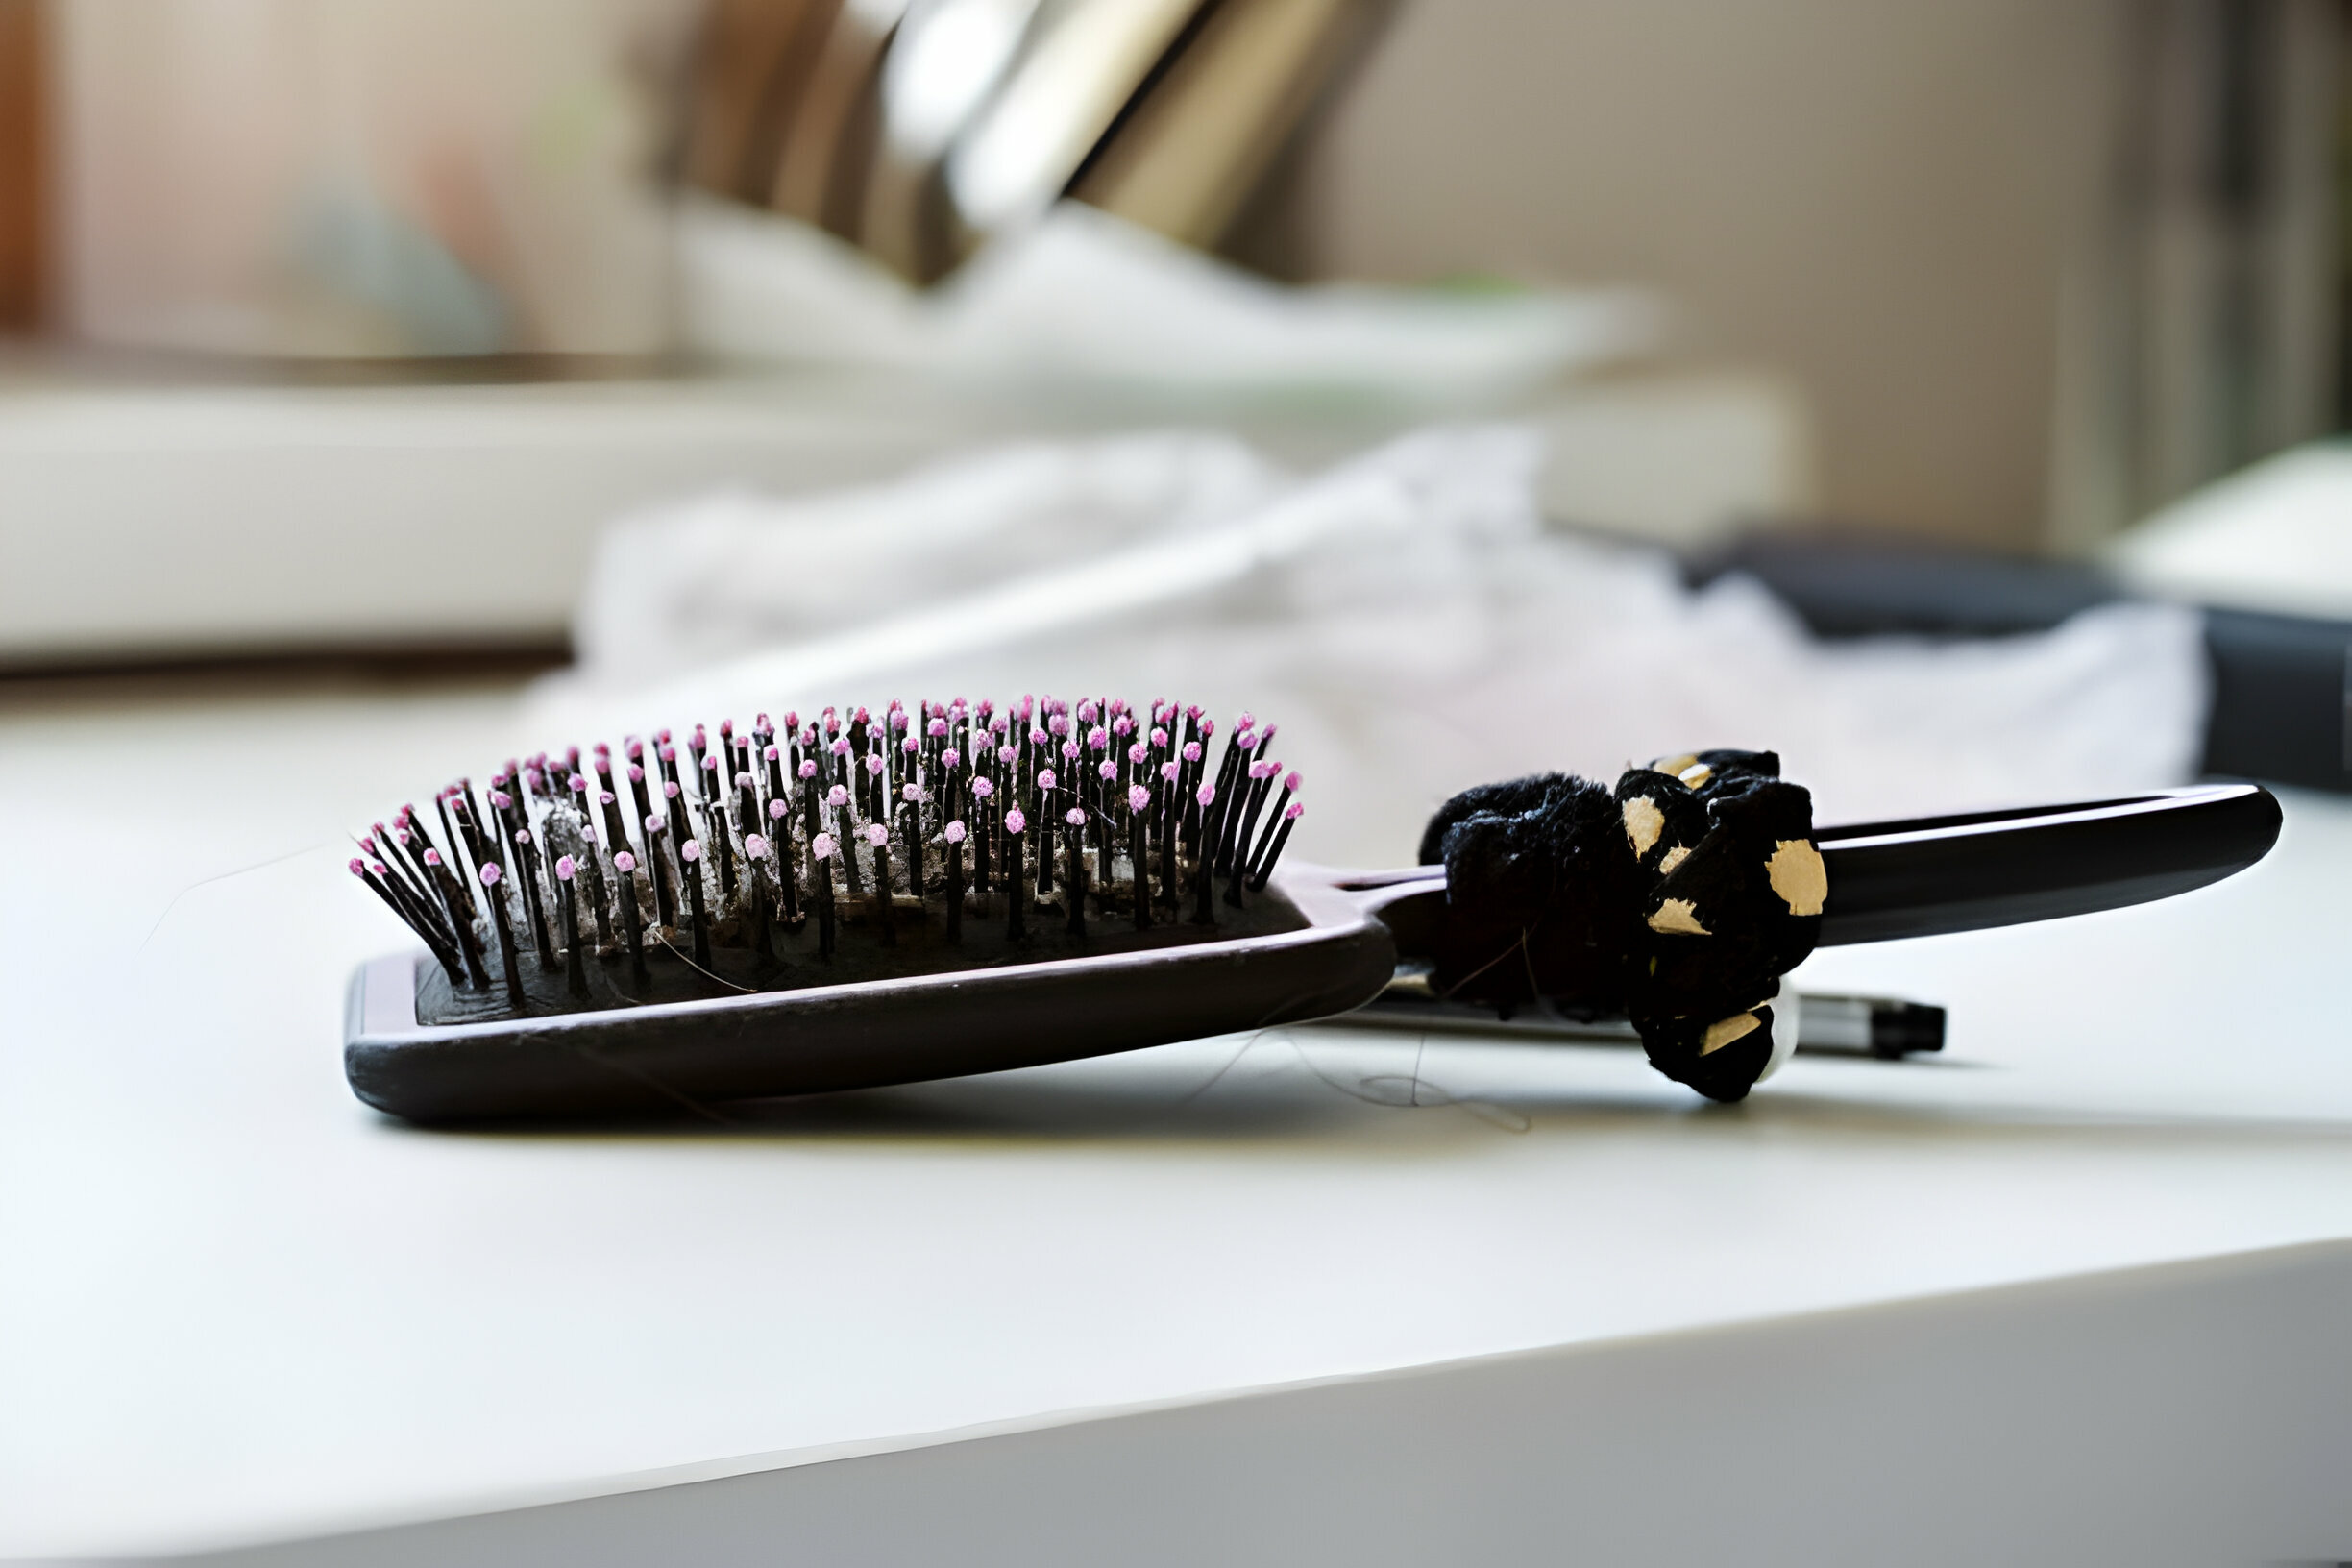
How to Clean a Hairbrush Cleanzen Image of a Hairbrush with Lots of Fuzz


Once you have your supplies ready, pull the accumulated hair out of the brush. You can use your hands for this. There are also special brush-cleaning tools available that look like tiny rakes. Keep in mind that you should remove the hair on a daily basis. When hair accumulates in the brush, it is not able to run through the brush as easily due to extra friction. This can lead to hair damage.


2. Using your preferred liquid soap, add the soap and water to your bowl. For a synthetic brush, soak it in the soapy water for approximately 10 minutes. For a wooden brush with natural bristles, dip the brush into the water, immersing the bristles.


3. Next, scrub the bristles and brush pad with the toothbrush. For both types of brushes, continue to use the toothbrush to scrub the grime away. Dip the brush in the soapy water periodically. Use the chopsticks or comb to free the debris. Once all of the debris has been removed, use a disinfectant spray or cotton swabs dipped in rubbing alcohol to target any particles growing on the brush.


4. Rinse the brushes with clean water. If your brush has a cushioned pad, push on this pad to remove any water trapped in it. Allow the brush to dry on the towel with the bristles faced down.


FAQs


Why It’s Important to Clean Your Hairbrush?


How to Clean a Hairbrush Cleanzen Image of a Woman Brushing Her Hair Infront of a Mirror


Cleaning your hairbrush regularly is an important habit to get into. This process only takes a few minutes to complete and is recommended every two weeks. However, the hair should be removed daily.


Your scalp normally sheds small flakes of skin as well as natural oils. When you brush your hair, these elements get on the brush. As they build up, they can foster fungal and bacterial growth. Each time you brush your hair with a dirty brush, you may spread fungal spores and bacteria through your hair. This ultimately can damage your hair and lead to scalp problems.


What Are the Signs I Need a New Hairbrush?


Cleaning your hairbrush can help you get the most life out of it, but you will eventually need to replace it. There are a few signs that indicate the need for a replacement.


If the bristles are damaged or if some of them have fallen out, you should replace the brush as soon as possible. Broken and missing bristles can damage your hair. You also should make a replacement if the brush still appears dirty after you have washed it.


How Do You Deep Clean a Hairbrush?


Deep cleaning a hairbrush involves the basic cleaning steps as well as an extra disinfecting step. The basic steps involve removing the hair, dipping or soaking the brush in soap water and scrubbing it with a toothbrush. To disinfect the hairbrush, you should also apply rubbing alcohol to the bristles and pad using cotton swabs. An alternative is to use a disinfecting spray.


You may also enjoy our next blog: 51 Genius Cleaning Tips For a Sparkling Home

The post How To Clean a Hairbrush: 4 Steps to Clean a Hairbrush appeared first on Cleanzen.


from Cleanzen https://cleanzen.com/blog/how-to-clean-a-hairbrush/
via IFTTT

Monday, 15 January 2024

How To Clean A Keurig Coffee Maker: Steps to Care & Descale Your Coffee Maker

How to Clean a Keurig Coffee Maker Cleanzen Infographic


If it has been a while since you last cleaned your Keurig coffee maker, now is the time to act. Your single-serve coffee maker stores water in a reservoir, and this water can result in scaling mineral deposits and even mold. In addition, it can impact the coffee taste and flavor. The mineral deposits can also impact the functionality of the coffee maker’s boiler. Cleaning your Keurig coffee maker is easy to do and can be done in less than 30 minutes.


Signs You May Need to Clean Your Keurig


How to Clean a Keurig Coffee Maker Image of a Keurig Coffee Maker


With professional cleaning services Boston, you can take advantage of a clean home without hassle, but you also need to give your Keurig coffee maker attention from time to time. Even if the coffee maker is functioning well at the moment, it needs to be cleaned regularly. There are a few signs that indicate the need to descale and clean your Keurig.


For example, you may see hard water stains inside the coffee maker. When you use your Keurig, you may notice the distinct smell of mildew. When brewing your coffee, the Keurig may take more time to deliver your coffee, and the flavor of the coffee could be less robust. It may also not produce as much coffee as it normally would, and you may even spot granules at the bottom of your cup of joe.


How Often to Clean a Keurig Coffee Maker


The last thing that you want is to drink coffee prepared with moldy water or for the quality of your brew to be subpar. Generally, cleaning your Keurig coffee maker every three to six months will help you prevent these problems.


However, there are instances when you need to clean your coffee machine more frequently. For example, you should clean it every two months if you normally brew more than eight cups per day.


How to Clean a Keurig Coffee Maker


Cleaning your Keurig coffee maker is a straightforward process. The first step is to empty the water from the reservoir. Then, disassemble the coffee maker’s removable parts. This includes the steamer compartment if you have an espresso machine. Some Keurig coffee makers have dishwasher-safe parts. Read your owner’s instruction manual for full details about your specific model. If you cannot put the parts in the dishwasher, you will need to hand wash them.


While your Keurig coffee maker is disassembled, clean around the water reservoir base and the opening for the K-cups. You can use white vinegar or descaling solution and a small brush for this step. If your Keurig coffee maker has a reusable filter, this should also be cleaned. While you can run this filter through the dishwasher, you may get better results by soaking the filter in white vinegar. To remove the trapped coffee grounds, use a small cleaning brush.


Check out this TikTok video and see how easy it is to clean your Keurig coffee machine in a snap!


@home_reimagined

How to Clean your K-Cup Kurig Coffee Machine ✨ how often do you use your machine a week? You probably are in need of a deep clean! Follow these instructions on how to deep clean your coffee machine #cleantok #cleaningtiktok #cleaninghacks #cleaningtips #cleaningmotivation

♬ Coffee for You Head – Vinyll

How to Replace the Water Filter


Your Keurig’s water filter should be replaced every couple of months. However, how heavily you use your Keurig will impact the recommended frequency. If you have a newer model, your Keurig may tell you when a filter replacement is necessary.


To begin, allow the new filter to soak in a bowl of water for approximately 10 minutes. While you are doing this, pull up the filter holder in the machine to remove the old filter. You will need to press on both sides of the filter to remove the clips holding it in place.


Before placing your new soaked filter in the machine, rinse it under the tap for 60 seconds. Then, put it in place using the clips, and press it in the reservoir until it is locked firmly in place. You can then reset the filter replacement reminder timer in the machine or add a reminder in your phone.


How to Descale a Keurig Coffee Maker

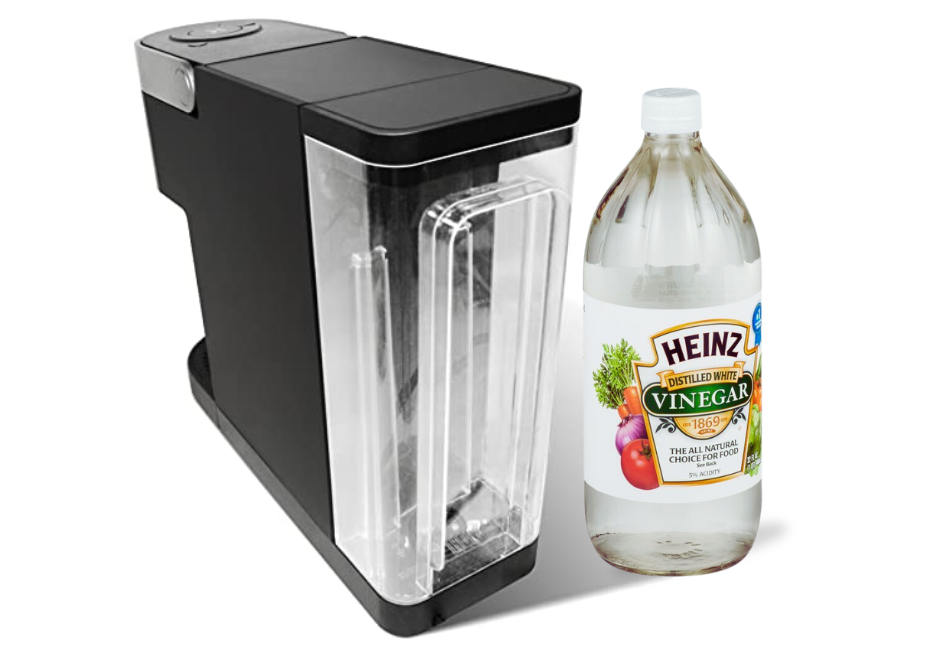
How to Clean a Keurig Coffee Maker Image of a Keurig Coffee Maker Water Reservoir and Bottle of White Vinegar

You also need to clean the non-removable, interior components in your Keurig. The best way to descale Keurig is by running white vinegar through it. Once your reservoir is clean, reassemble the machine. Then, pour one part water and two parts white vinegar into the reservoir.


Run the machine to pass this solution through the coffee maker. Allow the system to rest for an hour or two. Then, rinse out the reservoir, and run fresh water cycle through the system. You may need to repeat this step a few times so that all of the vinegar is removed. Vinegar is not toxic, but any remnants can impact the flavor of your coffee.


FAQs


Is Vinegar Enough to Descale a Keurig Coffee Maker?


White vinegar is slightly acidic. This makes it well-suited for removing buildup minerals in the coffee maker. However, you should not run straight vinegar through the system as it may eventually lead to damage.


Instead, use four cups of vinegar with two cups of water. Simply add this vinegar solution to the reservoir, and allow the full reservoir to run through the coffee maker. Remember to follow this up by running clean water through the reservoir.


How Do I Deep Clean My Keurig Without Vinegar?


If you do not have white vinegar in your house or you simply cannot tolerate the smell, you can use other ingredients. Both baking soda and lemon are suitable alternatives.


If you use baking soda, use four parts water with one part baking soda. If you prefer to use lemon juice, ensure that the rind, bulb and seeds are removed first. Keurig also makes a descaling solution for this purpose.

The post How To Clean A Keurig Coffee Maker: Steps to Care & Descale Your Coffee Maker appeared first on Cleanzen.


from Cleanzen https://cleanzen.com/blog/how-to-clean-a-keurig-coffee-maker-steps-to-care-descale-your-coffee-maker/
via IFTTT

Wednesday, 10 January 2024

How to Wash and Dry a Comforter Without It Getting Lumpy

How to Wash and Dry a Comforter Without It Getting Lumpy Cleanzen Infographic


Snuggling under a warm, fluffy comforter traps the warmth of your body for a comfortable night’s sleep. Eventually, though, you’ll need to learn how to clean your comforter. To do so, take a minute to look for the care tag to find out about the fiber content.


Most comforters or duvet inserts can be washed at home, but some have outer coverings that require dry cleaning. If the comforter is washable, follow the steps below to wash the comforter at home or your local laundromat. Here’s how to wash and dry a comforter so you can sleep soundly tonight under clean and cozy bedding.


How Often Do You Wash Comforters?


How to Wash and Dry a Comforter Without It Getting Lumpy Cleanzen Image of a Little Girl Having A Nap in Bed


We always get this common question: How often should you wash your comforters? Unless you spill something or use your comforter without a barrier layer like a sheet, cleaning your comforter 2-4 times per year should be enough.


If your comforter is seasonal, it’s recommended you go through the cleaning process and always wash before and after each storage. However, a duvet cover or blankets that come in direct contact with skin should be washed more often.


Can You Wash a Comforter in a Washing Machine?


In most cases, down-filled comforters are filled with synthetic down alternatives are easy to clean and dry at home, especially if you have a spacious washing machine. If you don’t have a large-capacity washer, head to your local laundromat.


A smaller household washer could compress and distort the filler. You can also wash a comforter by hand in the bathtub, but the comforter will become very heavy and can take several days to dry.


For down comforters, the feathers are a bit more temperamental than synthetic poly-fill. Always use a mild detergent or downwash to prevent stripping the natural oils from the feathers.


How To Wash A Comforter


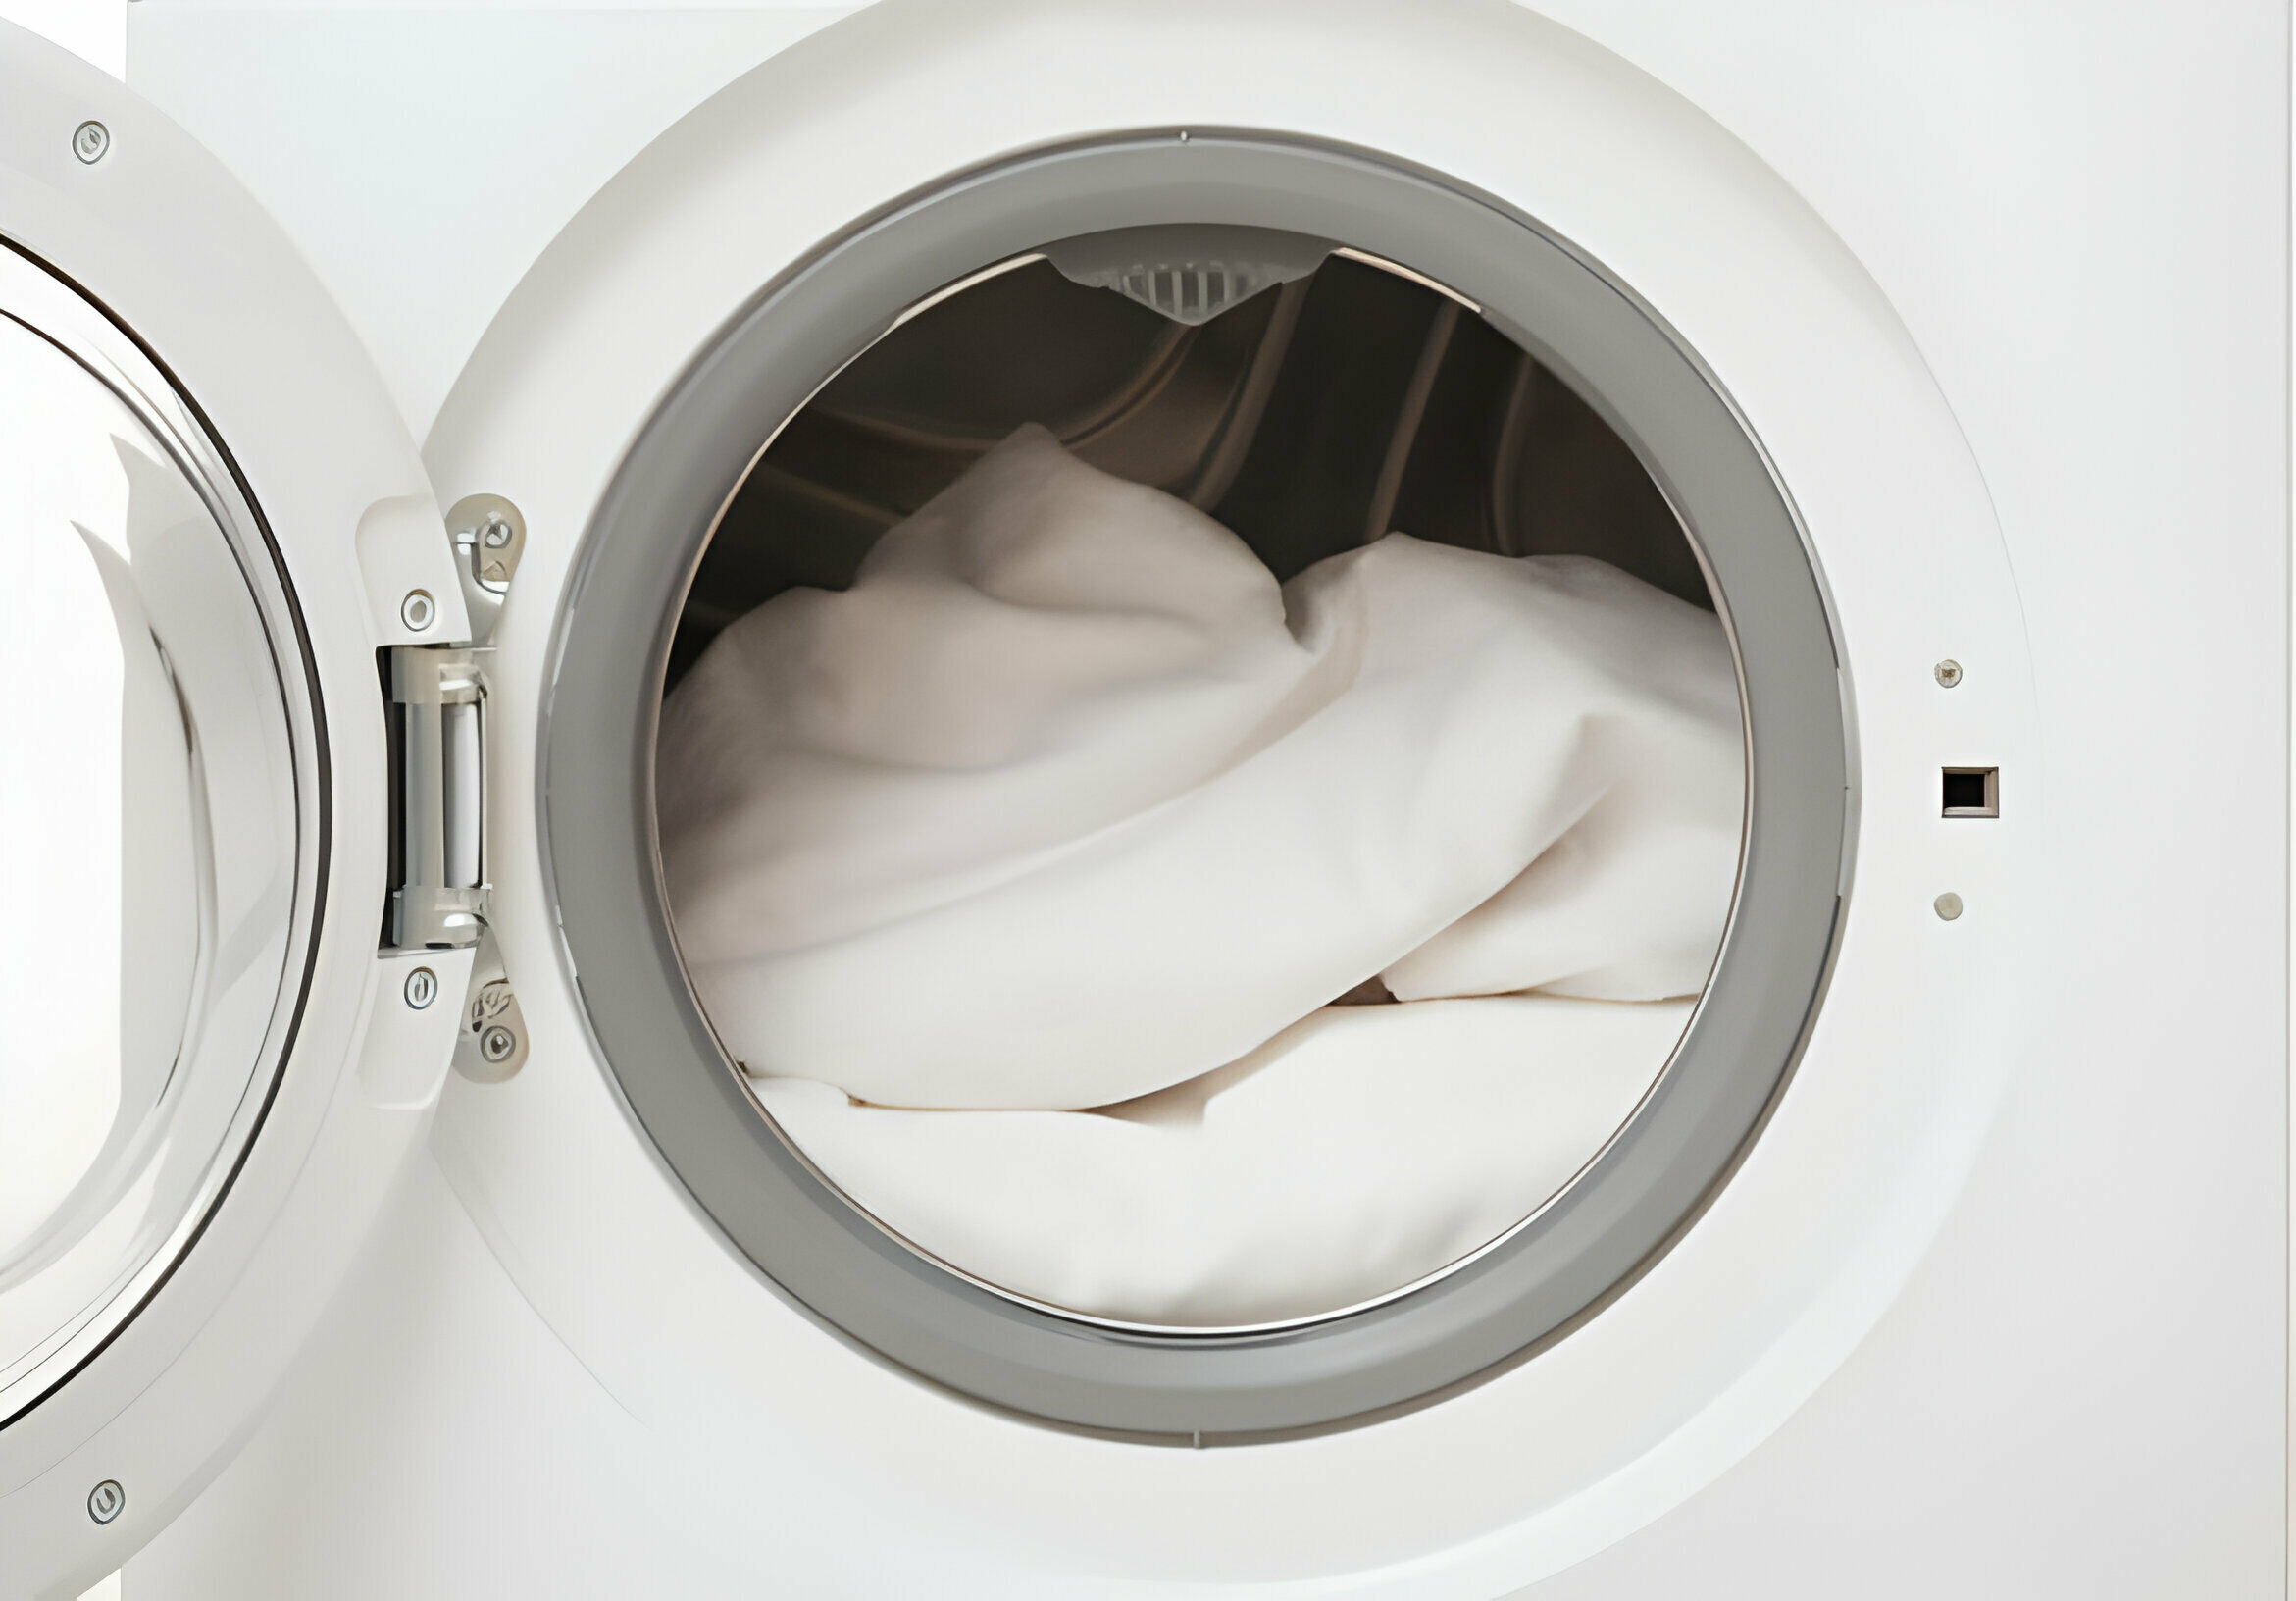
How to Wash and Dry a Comforter Without It Getting Lumpy Cleanzen Image of an Opened Washing Machine Full of Comforters


Washing a comforter requires careful handling to ensure it stays clean and retains its shape. Learn how to wash and dry comforters using your own washer and dryer at home or wash it by hand.


How To Wash Down Comforters

  • First, check the care label. Comforter’s care labels provide important information on how to properly clean and care for the specific fabric and filling.
  • Then proceed with pretreating any stains before washing. Then select the gentle wash cycle and cold water setting on a using a large capacity washer.
  • Add just two to three teaspoons of mild detergent to the washer drum or detergent drawer. Do not use any type of fabric softener. It can damage the feathers.
  • Load the comforter, wash the comforter by itself to prevent excessive wrinkling or lint transfer.
  • When the cycle is complete, do an extra rinse cycle to help ensure that all of the detergent residue is removed from the down. Remove the comforter from the washer and give it a good shake.
  • Place the comforter in an automatic dryer with several wool dryer balls. Dry on low heat and remove it from the dryer every 15 minutes to manually break up any clumps of feathers. It can take a couple of hours to completely dry.
  • If you do not have an automatic dryer, spread the comforter over a drying rack. Place it in a warm room and add a circulating fan to speed drying. Fluff the comforter often to break up clumps and turn it frequently for even drying.


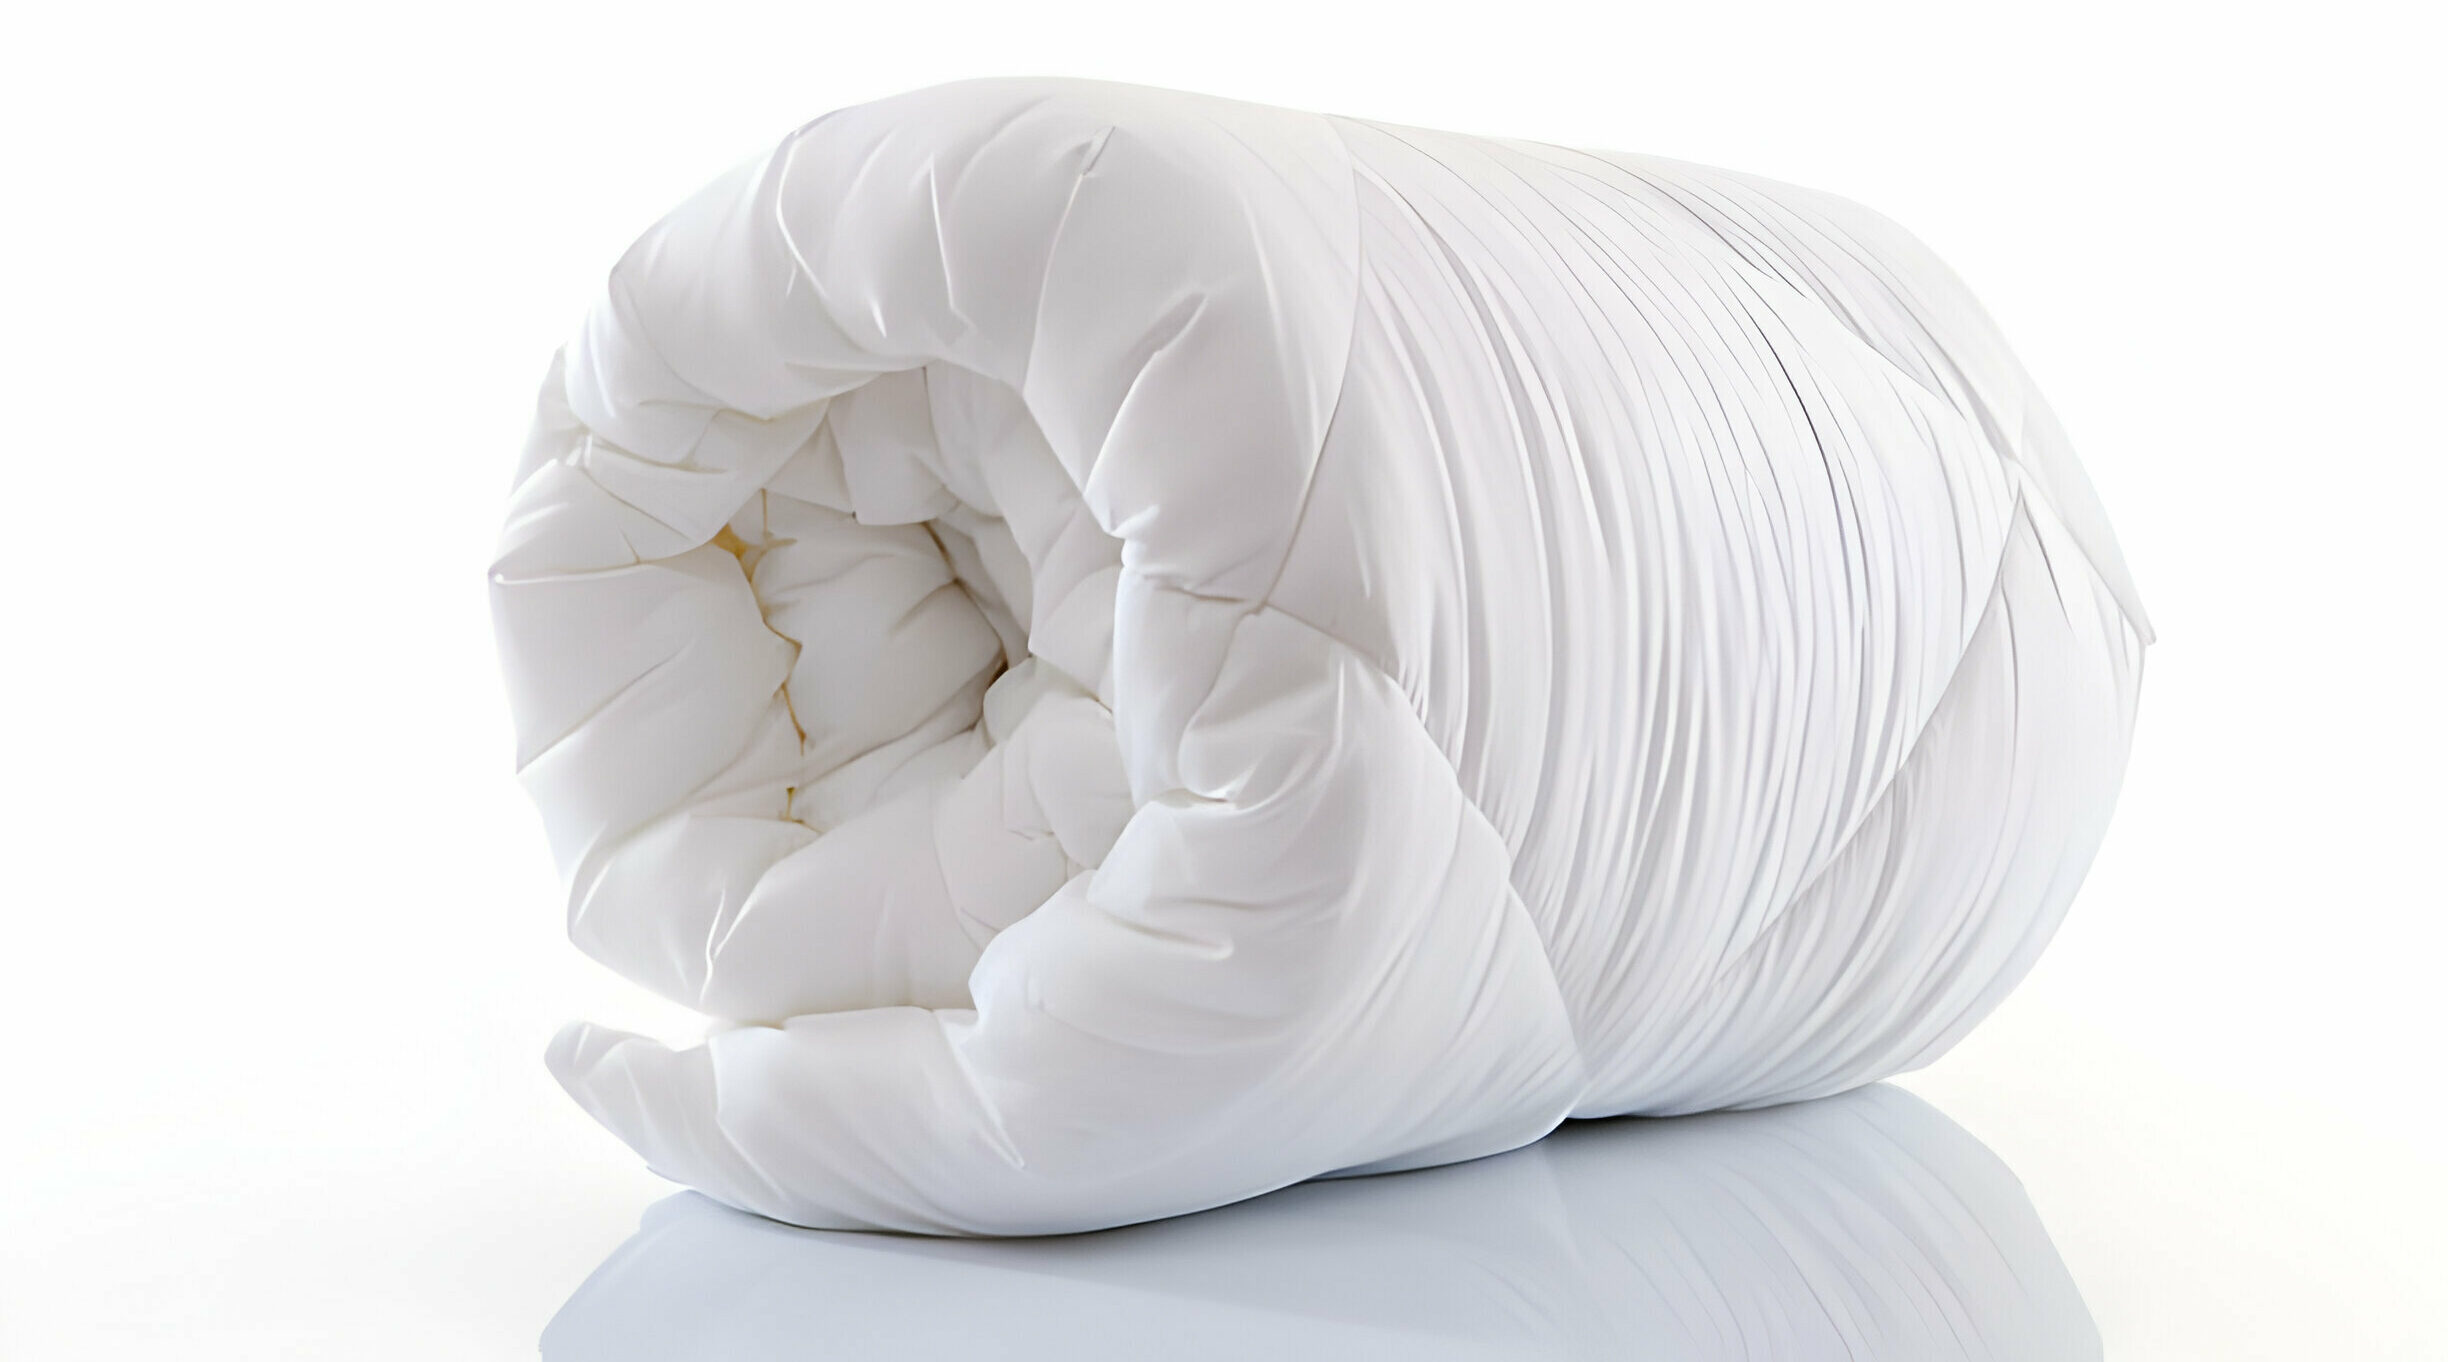
Washing Down Alternative ComfortersHow to Wash and Dry a Comforter Without It Getting Lumpy Cleanzen Image of a Down Comforter


  • After pretreating the stains, select the gentle cycle and cold or warm wash temperature on the washer. If you do not have a large capacity washer, use a commercial washer at your local laundromat to prevent overloading your washer. The comforter needs room to move through the water in the washer to get clean.
  • Add your regular detergent to the drum or distribution drawer of the washer. Use no more than 2 teaspoons of a high-efficiency detergent or one laundry detergent pod. Excess suds and detergent residue are difficult to remove from the comforter’s filling.
  • Pour 1/2 cup distilled white vinegar into the fabric softener distribution drawer or add it during the final rinse to help remove any detergent residue.
  • Wash it alone to prevent excessive wrinkling and lint from other fabrics. After the washer cycle is complete, remove the comforter and give it a good shake to help remove wrinkles.
  • Place the comforter in an automatic dryer with a few wool dryer balls. The dryer balls will help fluff the interior filling. Dry the comforter on medium-low heat.
  • You can also hang the comforter from a clothesline or drape it over a drying rack. If air-drying, shift and fluff the comforter every few hours to help redistribute the filling fibers.
  • Do not place the comforter back on the bed or store it until it is fully dry.


Washing Comforters By Hand


Washing your comforter at home may be simplest using a large capacity washer and dryer, but for those without front or top load washing machine, and without access to a laundromat, a bathtub can be used. If hand washing is the best available option, follow the steps below to wash your comforter in the tub:

  • Fill half of your tub with cold or warm water.
  • Pour a cap of mild laundry detergent into the water and mix it in with your hand.
  • Immerse your comforter and gently swirl it through the water.
  • Let your comforter soak for 10 minutes.
  • Gently press your comforter down to release soap from the fabric and filler.
  • Drain the tub, then rinse your comforter with warm water to remove excess soap.
  • Gently squeeze your comforter, or press it down, to remove excess water. Don’t wring it out, since wringing can damage the filling.
  • Hang your comforter dry.


Drying Your Comforter

  • Bulky bedding like a comforter needs room to move around for uniform drying. If possible, dry your comforter on a cycle designed for bulky items and customize the cycle to dry with low or no heat, unless the care label says otherwise. Add two or three dryer balls to the load so that the filling moves around as it dries. This allows warm air to circulate more efficiently which may help reduce drying time. It may be best to avoid using dryer sheets that contain fabric softener, but this varies by material type, so be sure to reference your comforter’s tag before you add any to the load.
  • Keep the load balanced, remove the comforter from the dryer every half hour or so and fluff to redistribute the filling. Return to the dryer and continue the cycle until it is dry. Some dryers monitor inside moisture and air temperatures to help loads get evenly dry.
  • When the comforter feels almost dry, allow it to hang so that fresh air can circulate it for a few hours, and ensure that the comforter is dry completely before putting it on the bed.


How to Keep Your Comforter Clean Longer


How to Wash and Dry a Comforter Without It Getting Lumpy Cleanzen Image of a Duvet and Pillows on a Bed


  • Use a removable duvet cover on your comforter and wash it regularly.
  • Always use a top sheet, which serves as a barrier between you and your comforter. A sheet is much easier and quicker to wash than a comforter.
  • Flip the comforter often to allow trapped moisture in the filling to thoroughly dry after each use.
  • Freshen the comforter between washings by hanging it on an outside clothesline on a breezy, sunny day.
  • Place the comforter in an automatic dryer on air-only between washings to remove dust and crumbs.
  • Use a fabric refresher spray between washes to help remove odors. Spray the comforter on both sides.
  • Blot spills and stains immediately to prevent them from seeping into the comforter filling.
  • Keep pets off the bed.
  • Avoid eating or drinking in bed.


FAQs


What are common mistakes people make when washing their comforter?


Some forget to tend to comforter stains before throwing their comforter or duvet cover into the washing machine. It’s a good idea to spot clean and pretreat stains using the recommended cleaning detergent as an initial step in the washing process. This can effectively break or loosen these stains from the comforter, allowing the stain to be easily removed.


Check for loose threads or torn seams, and stitch or repair any found on the comforter with a needle and thread to prevent further damage to the comforter. Use a gentle, fragrance-free detergent, especially for down or sensitive materials, to maintain the integrity of the comforter and avoid skin irritation for those with sensitivities.


It’s important to know and be mindful of the water temperature and cycle settings according to the care label instructions, as hot water or aggressive cycles can shrink or damage certain fabrics. When it comes to drying it bears repeating that you don’t want to put a moist comforter on your bed or in storage. If storing, do so in a breathable bag and ensure the comforter is fully dry before storage to prevent mildew growth.


How do you smooth out a lumpy comforter?


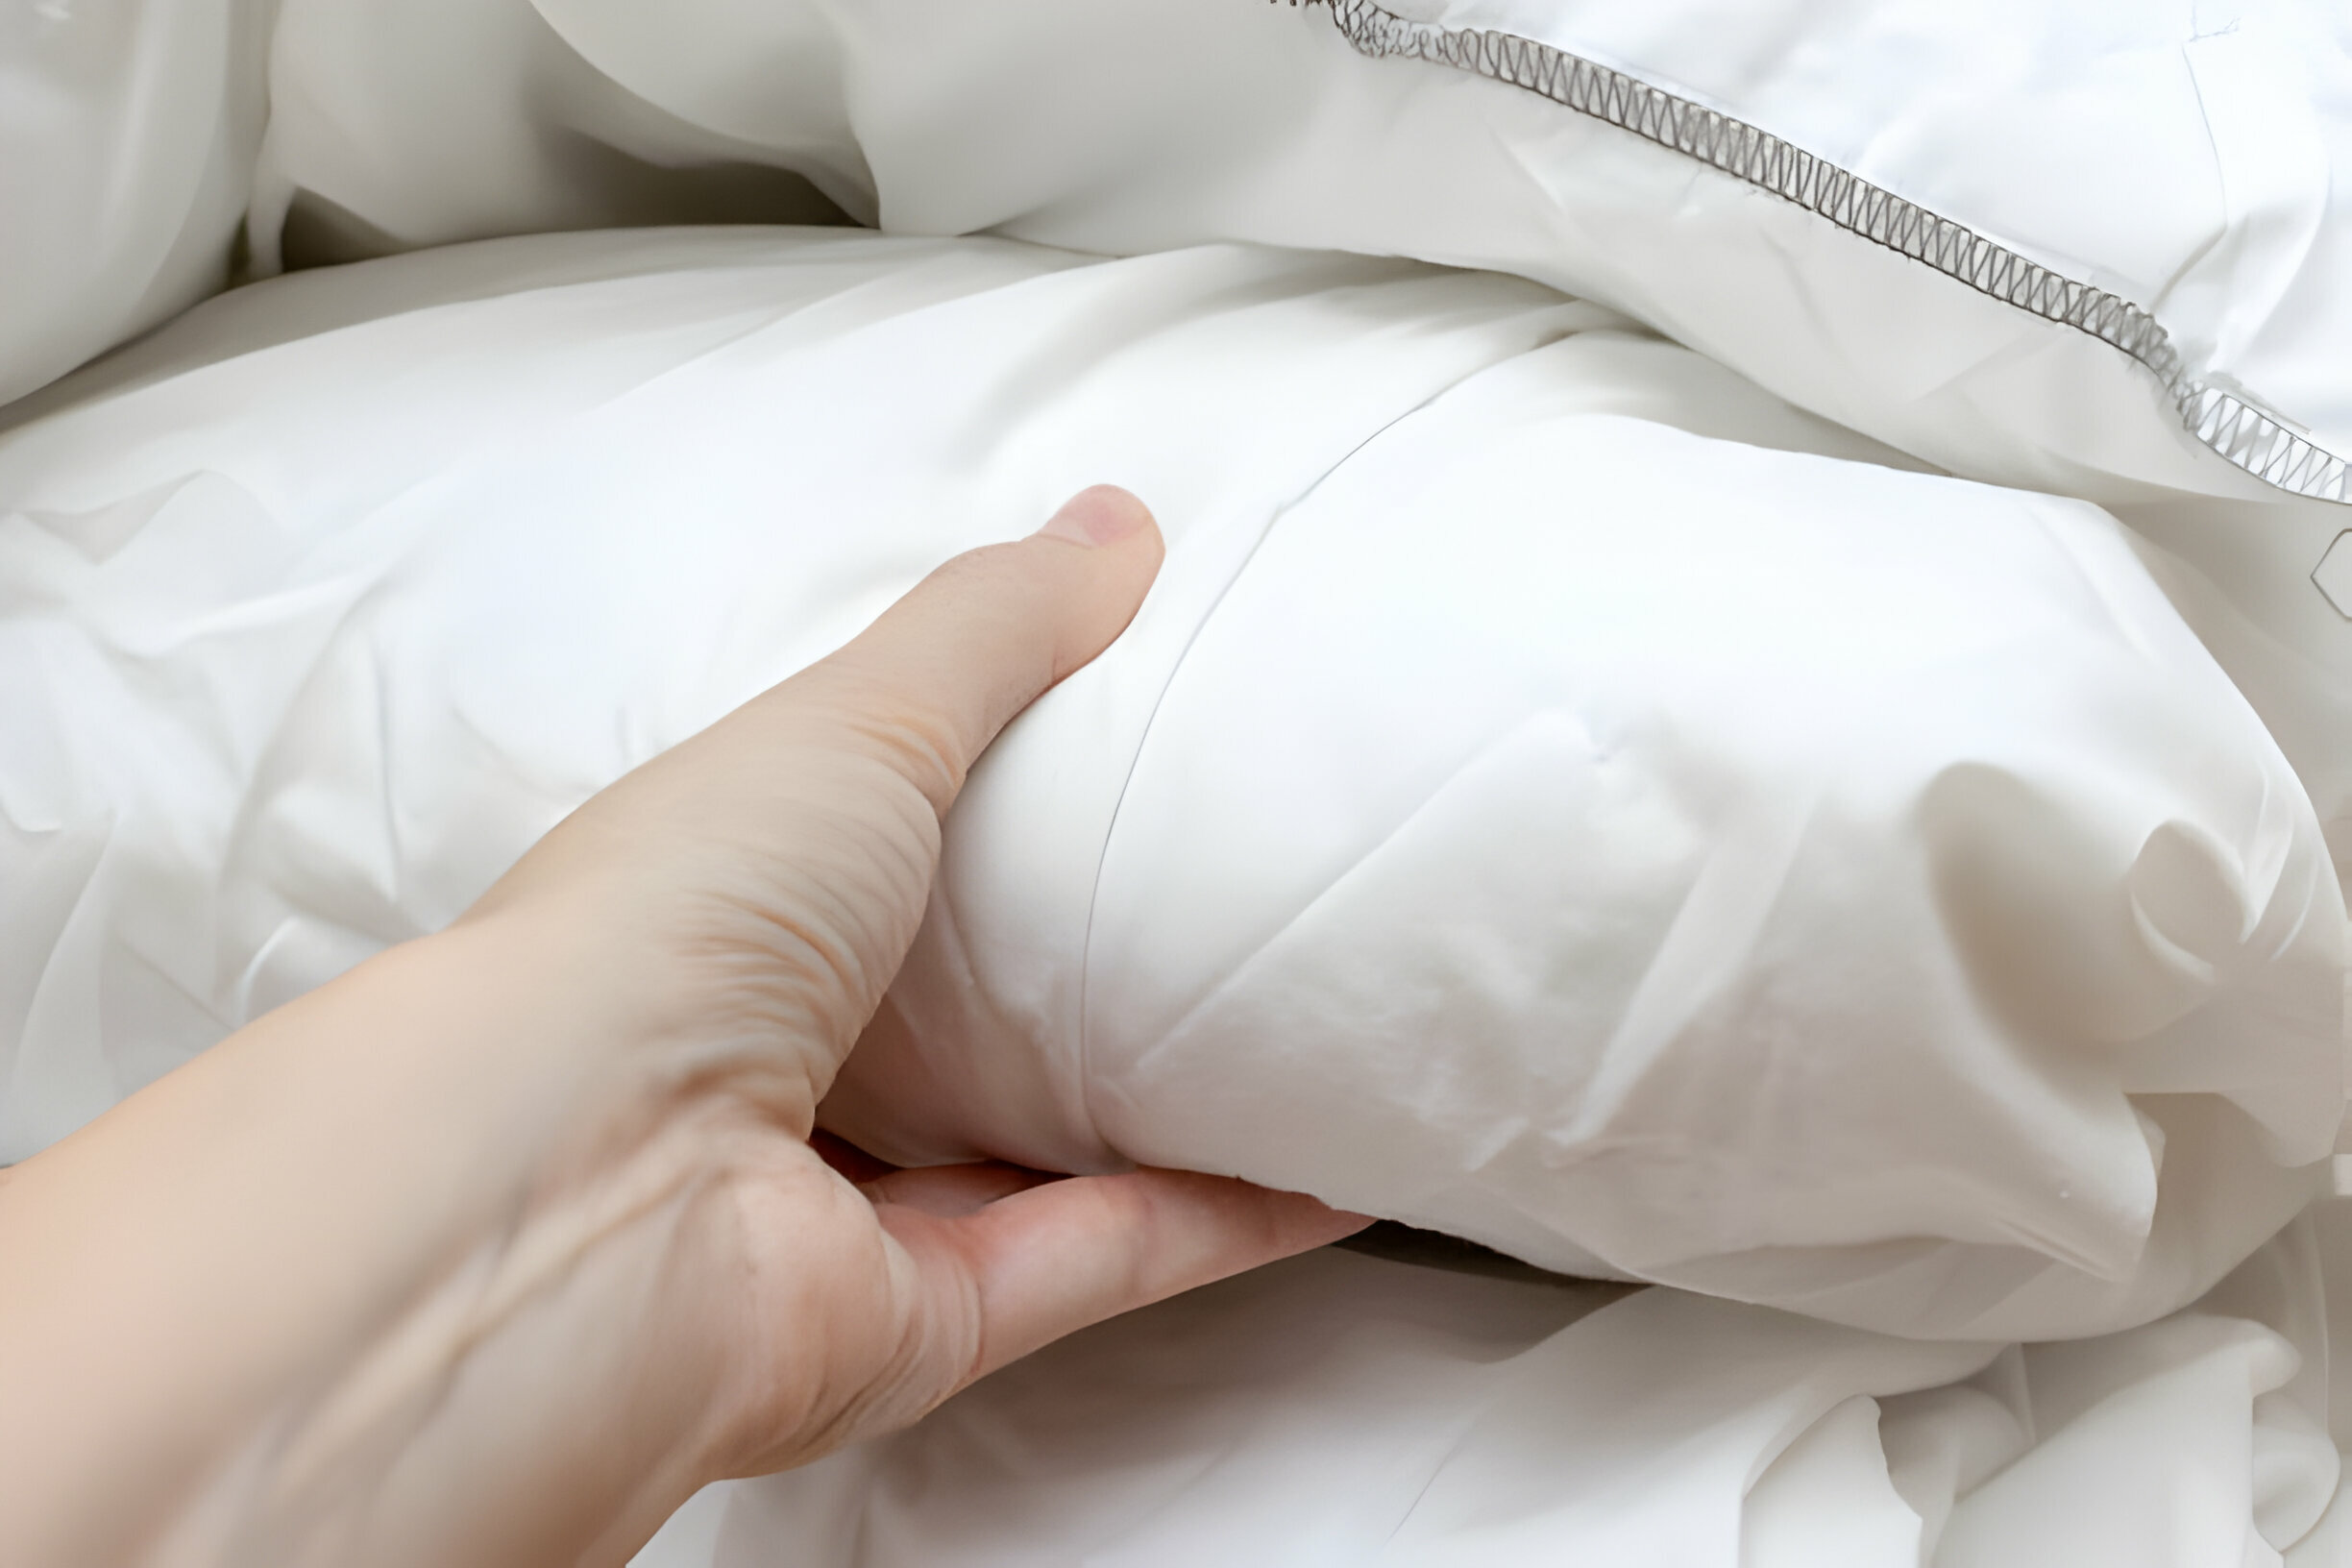
How to Wash and Dry a Comforter Without It Getting Lumpy Cleanzen Image of a Womans Hand Holding A Comforter


There are a few ways to do this. First, try holding it by the edges and shaking it out. If that doesn’t work, lay the comforter flat and use your fingers or the palms of your hands to massage the filling and break up the clumps. A third option is to hang it over a clothesline in the backyard. Gravity and the wind moving through the comforter will naturally readjust the filling.


Should you take your comforter to the dry cleaner?


Comforters, especially those made of delicate materials like wool, silk, cashmere, or down, often require dry cleaning rather than machine washing. Dry cleaning uses chemical solvents that are gentler on fabrics and prevent shrinking and warping.


For more tips and tricks from your favorite cleaning services in Boston, be sure to follow our blog full of cleaning helpful hacks and DIYs for around the house. You can also browse and book your own services from our team for your home or apartment. We’re here to help you keep your home happy and healthy all year long!

The post How to Wash and Dry a Comforter Without It Getting Lumpy appeared first on Cleanzen.


from Cleanzen https://cleanzen.com/blog/how-to-wash-comforter/
via IFTTT

Simple Steps to Clean Airpods Without Damaging Them

  Airpods are placed directly in the ear canal with each use. In the ear, they can collect wax, dirt and other elements. This makes the ai...